Are you in the mood for some pumpkin spice? How about a little pumpkin bong action? Yes, it’s that time of year again when the leaves start to change color and everyone starts thinking about Halloween. If you’re looking for a fun way to get into the spirit, why not try making your own pumpkin bong?
It’s easy to do, and all you need is a few supplies from your local store. We will teach you how to make a pumpkin bong in just a few simple steps! You only need 5 main items to build a pumpkin bong.
Supplies to Build a Pumpkin Bong
- A small pumpkin (around 8 inches in diameter)
- Orange Sharpie
- A sharp knife or carving tool
- A spoon or your hands (for cleaning out the inside of the pumpkin)-
- Water
- Bowlpiece (for the bowl of your bong)
- Downstem
- A straw mouthpiece or some sort of tube mouthpiece
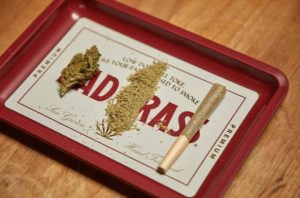
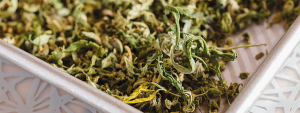
- Your favorite spooky strain
- First, you will need to find a small pumpkin. The ideal size for a bong is around eight inches in diameter. If you can’t find a small pumpkin, you can also use a squash or gourd. You want to use a smaller pumpkin so that your downstem, mouthpiece, and bowl will function correctly. A larger pumpkin will require longer downstems, more water, and just make the bong harder to use.
- You’ll then want to mark your pumpkin’s cutting holes. To do this, take your orange sharpie. We suggest using orange so the marks are not viewable after cutting your holes. When using a black sharpie you may see some sharpie marks if your holes are not perfectly cut.
- Pumpkin Top Hole: use a sharp knife to cut off the top
- Downstem Hole: This hole should be on the side of the pumpkin at a level that allows your downstem to reach into the pumpkin and access the water. Your downstem hole should not be so high where you have to fill the entire pumpkin with water.
- Mouthpiece Hole: This hole should be near the top of the pumpkin where no water would reach. Make sure you cut the correct size depending on the mouthpiece you are using. For a straw, your hole should be very small.
- Now, cut the top of the pumpkin. Make sure you cut this in one clean cut. You need the top to be relatively tight to ensure you’re able to smoke out of it.
- Next, you will need to clean out the inside of the pumpkin. Remove all the seeds and stringy bits. You can use a spoon or your hands to do this. Once the inside of the pumpkin is clean, Rinse it out with water and let it dry.
- Now, it’s time to prepare the pumpkin for your downstem. You can use any kind of downstem that you’d like, but we recommend placing it at a 45 degree angle. You’ll need to make the hole at that angle as well. Once you have made the hole, insert the downstem into the pumpkin.Then place the bowl piece in the downstem.
- Next, use your knife or carving tool and carve out the mouthpiece hole. Again, make sure to cut the correct size so that your mouthpiece seals tightly. You don’t want any of the “good smoke” to seep through.
- Add water and it’s time to smoke.
Finally, it’s time to smoke! Put your mouth over the top of the pumpkin and light the bowl. As you inhale, the smoke will filter through the water and into your lungs. Enjoy your homemade pumpkin bong!
- SEO Powered Content & PR Distribution. Get Amplified Today.
- Platoblockchain. Web3 Metaverse Intelligence. Knowledge Amplified. Access Here.
- Source: https://cannabistutorials.com/7-steps-to-building-a-pumpkin-bong/
- 1
- 7
- a
- Able
- About
- access
- Action
- After
- All
- allows
- and
- around
- Black
- build
- Building
- change
- Cleaning
- color
- CSS
- Cut
- cutting
- Degree
- Depending
- Dont
- dry
- enjoy
- ensure
- Entire
- everyone
- few
- fill
- filter
- Find
- from
- fun
- function
- get
- halloween
- Hands
- High
- Hole
- Holes
- How
- How To
- HTTPS
- ideal
- in
- IT
- items
- Kind
- larger
- Level
- light
- little
- local
- longer
- looking
- made
- Main
- make
- Making
- mark
- more
- mouth
- Near
- Need
- ONE
- Orange
- own
- piece
- Place
- placing
- plato
- Plato Data Intelligence
- PlatoData
- Prepare
- put
- reach
- recommend
- relatively
- remove
- require
- seeds
- should
- Simple
- Size
- small
- smaller
- Smoke
- So
- some
- spice
- spirit
- start
- starts
- Steps
- store
- Take
- The
- Thinking
- Through
- tightly
- time
- to
- tool
- top
- use
- Water
- will
- would
- year
- Your
- zephyrnet
More from Cannabis Tutorials

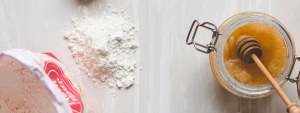
Weed-Infused Delight: Delicious and Easy Weed Dinner Recipes for the Cannabis Connoisseur
Source Node: 1913650
Time Stamp: Jan 19, 2023

What is Cannabis Cooking and Why You Should Be Doing It
Source Node: 1911938
Time Stamp: Jan 19, 2023