Welcome to this Amirdrassil the Dream’s Hope boss guide, the newest raid coming to WoW in patch 10.2. This raid brings 9 new bosses for players to defeat, here is the quick TLDR on every boss so you can be prepared.
Gnarlroot
Gnarlroot is a fight that switches between two phases. When the fight starts he is in phase 1, and when Gnarlroot reaches 100 energy he transitions to phase 2. Once his energy has been depleted he goes back into phase 1.
Everyone
- Flaming Pestilence will spawn several swirls when cast, avoid standing in these. Tainted Lashers will spawn where the swirls landed. On Heroic and above these Tainted Lashers will be dormant when they spawn.
- Controlled Burn is placed on random players, and creates a large circle around them. When Controlled Burn expires it deals shadowflame damage, and drops a Shadow-Scorched Earth on the floor. On heroic and above any dormant Tainted Lashers inside the circle will become active. Players with this should get out of the group so the fire isn’t in the way. On heroic or higher players should aim to hit as many Tainted Lashers as possible.
- Tainted Lashers will buff nearby lashers with Vicious Thicket which increases their haste by 10% per stack. At 15 stacks they become Overgrown which makes them immune to CC and interrupts. The lashers can quickly become deadly if ignored.
- Shadowflame Cleave is a frontal cone aimed at a random player. Players must quickly move to avoid this.
- On mythic the boss will also spawn Tainted Treants, which are dormant and must be activated with Controlled Burn. These adds will cast Blazing Pollen, and must be interrupted every time. If this cast goes off then the 5 closest players to the add will take heavy fire damage and be disoriented for 3 seconds.
- Tainted Treants will also hurl Flaming Sap at random players. This slows the targeted player and makes them take heavy fire damage every 2 seconds. Anyone within 6yds of the targeted player will also take heavy fire damage.
- At 100 energy the boss will enter phase 2 and channel Doom Cultivation. While channeling he takes 99% reduced damage. At the start of the cast he spawns Doom Roots and awakens any dormant adds.
- During this phase Gnarlroot will have Toxic Loam under him. Anyone that stands in this takes deadly shadowflame damage every second and has their movement speed reduced by 80%. So players should get away from the boss ASAP when phase 2 starts.
- Avoid standing on brown swirls where Doom Roots will spawn.
- Players with Ember-Charred dot need to run into the Doom Roots to burn them and end the phase. On heroic and higher this dot is only applied to players that soak Splintering Charcoal.
- On heroic difficulty and up Gnarlroot will cast Splintering Charcoal every 8 seconds. This spawns several circles that must be soaked by at least one player. If no one soaks it then the raid takes heavy shadowflame damage. Players that soak this take shadowflame damage and have 5 stacks of Ember-Charred applied to them. Running into a Doom Root will remove one stack.
- When all the Doom Roots have been burned it will trigger Uprooted Agony. Gnarlroot will take 100% increased damage, is immobilized, and will pulsate shadowflame damage every second for 20 seconds. DPS should hold cooldowns accordingly for this burn phase.
- After each Uprooted Agony the boss will gain a stack of Rising Mania. This increases Gnarlroot’s damage by 10% per stack.
Tanks
- Dreadfire Barrage is the tank swap mechanic, tanks should switch after every cast. This ability deals heavy Physical damage and shadowflame damage, and puts a debuff on the target that increases their shadowflame damage taken by 20% for 34 seconds. This effect stacks.
- Off tank should pick up Tainted Lashers to prevent them from killing other players. They place a bleed debuff called Shadow Spines on their target. This deals shadowflame damage and applied a dot that makes the target take 10% increased damage and bleed for physical damage every second for 10 seconds. This effect stacks.
Healers
- Tortured Screams happens throughout phase 1. This deals heavy raid wide damage and puts a dot on all players. This dot deals shadowflame damage every second for 10 seconds.
- Focus healing on players that are targeted by Controlled Burn.
- Watch tanks carefully if a lot of lashers are active.
- On heroic and higher be ready for raid wide damage whenever players are about to drop Controlled Burn on inactive Tainted Lashers. Each lasher that is activated by Controlled Burn will deal raid wide shadowflame damage. On mythic any Tainted Treants awakened will also deal raid wide damage.
- On mythic make sure to spot heal players that are targeted by the Tainted Treant’s Flaming Sap casts. Also be ready to spot heal players if any casts of Blazing Pollen go off.
- The raid will take damage every 5.2 seconds during Doom Cultivation.
- Major healing cooldowns and defensives should be used for Uprooted Agony.
- Be ready for increasing raid damage as the boss gains stacks of Uprooted Agony.
Igira the Cruel
Everyone
- Stay away from the tanks to avoid getting one shot by boss.
- Igira will face a random player to cast Twisting Blade at. This fires three slashes in front of her that travel outwards. Players need to move away from this effect ASAP to avoid taking damage and getting knocked back.
- Blistering Spear targets random players and puts a circle around them. When Blistering Spear expires each player will take heavy shadowflame damage, as well as anyone within their circles. A Blistering Spear will then spawn tethering the targeted player to it, and Blistering Torment spawns around the spear. This deals heavy shadowflame damage every second to players standing in it until the spear is destroyed. Players targeted by Blistering Spear should use defensives to reduce the damage.
- Players targeted by this should try and get the spears as close together as possible without overlapping their circles too much.
- DPS must quickly kill these spears to release the tethered players.
- When the boss reaches 100 energy she will channel Marked for Torment. This inflicts heavy raid wide damage and knocks back all players. She will then throw three weapons into the area. Players will need to choose one weapon to get rid of.
- While channeling Marked for Torment, Searing Sparks will spawn in the area. Where these will land are shown by orange swirls. Any players hit by these will take heavy damage and be knocked up, so players should avoid these if possible.
- On the left side she will throw an axe, the middle will be a knife, and on the right will be a sword. Each weapon will have a large circle around it, and if players stand in this the circle will shrink. Any players standing in these circles will suffer from Gathering Torment, which deals shadowflame damage every second until the circle despawns.
- On mythic players that absorb Gathering Torment will have Flesh Mortification applied. This increases the damage from Gathering Torment by 100% after 10 seconds. So players may want to wait for everyone to get there before entering Gathering Torment, so they can reduce the circle to nothing before 10 seconds have passed.
- If none of the weapons are soaked before the Marked for Torment cast ends, she will wipe the raid with Ruinous End. Each weapon can only be soaked one time, so an order should be determined before the fight starts. For example, soak Axe first, then sword, and finally knife.
- On mythic she will forge two weapons. This may mean that the raid will need to split into two groups, and soak 2 weapons each phase. Or the raid will soak one weapon, and she will choose a random second weapon. Either way, players will need to deal with two weapon effects after Marked for Torment ends.
- Depending on which weapons are soaked, Igira’s abilites will change. She will cast each special weapon ability twice before returning to her main weapon.
- The axe will give Igira Umbral Destruction, this is a large circle she puts around her main target. This is a soak that will split damage evenly between all players hit. However, anyone hit has a debuff applied that will make them take full damage from the next Umbral Destruction. So the raid should have the odd group soak first and evens second to manage this ability.
- The knife will give Igira Smashing Viscera. She will leap towards a random player, where she will land is shown by a large circle. All players should get out of this ASAP to avoid heavy shadowflame damage. On heroic and higher, when she lands several swirls will spawn in the area that need to be avoided.
- The spear will give Igira Heart Stopper. She will target several players who will have hearts appear above their heads. This places a healing absorb on them that must be healed off within 15 seconds, or the player will explode dealing heavy shadowflame damage to the entire raid. On heroic these players will have orbs shoot out of them when the healing absorb is broken. So they should spread to make the orbs easier for others to avoid.
Tanks
- Tanks need to stay close together to take hits of Vicious Swing which hits her main target and the next closest player. If there is no second player in range then she will hit her main target twice.
- Each melee strike will apply Drenched Blades. This is a bleed that deals shadowflame damage every 2 seconds for 20 seconds. This effect stacks, and tanks will probably swap at around 6 stacks. The off tank should not taunt until their dot expires.
Healers
- There will be a lot of raid wide damage to watch for when Ignira is channeling Marked for Torment. There is pulsating damage from Searing Sparks, as well as damage from soaking Gathering Torment. Healing CDs will most likely be used during this part of the fight.
- Focus heal players that are targeted by Heart Stopper to remove the healing absorb before it expires.
Volcoross

After Igira players can choose to go to Volcoross or Council of Dreams. Let’s take a look at Volcoross first. This area is a large platform on a lake of lava, with the boss in the middle. The boss remains stationary for the entire fight.
Everyone
- The raid will need to be split into two groups for an important mechanic in this fight, one will go left and the other right.
- Throughout the fight the boss will use Scorchtail Crash. Players will see a big shadow appear on the platform, and then the boss will slam its tail down. Players need to get away from the shadow ASAP, anyone hit by this will be killed. If a player somehow survives they will also be knocked back.
- On heroic and higher lava waves will shoot out from where the tail lands. Anyone hit by these will take fire damage every second while within the lava wave.
- Coiling Flames is applied to players throughout the fight. This is a dot that puts a circle around the player and deals fire damage to them every second for 12 seconds. Any players, that are not the player with the dot, standing in this circle are hit by Twisting Singe. This deals higher fire damage than the Coiling Flames dot. Players targeted by this should move away from others ASAP. The circle gets smaller over time but the damage done by both Coiling Flames and Twisting Singe will increase until Coiling Flames expires.
- On mythic a Coiling Eruption will trigger when Coiling Flames expires. This will deal fire damage to the player every second for 4 seconds. But more importantly, causes a massive explosion dealing deadly damage that is split evenly among all targets hit. So players will want to stack on this person after the initial Coiling Flames dot expires. After the eruption the flames will apply to another player. Any players hit by Coiling Eruption will have a debuff called Eviscerating Flames. If a player with this debuff soaks another Coiling Eruption they will take deadly fire damage. So the raid will need to create soak groups for both sides to manage this explosion.
- When the boss reaches 100 energy he will cast Flood of the Firelands. This creates two large circles which are group soaks. At least 4 players need to soak or the fire will cover the entire platform and wipe the raid. This is where the raid will need to split with the left group taking the left soak, and the right group takes the right soak.
- Once the soak has gone off it will leave behind Hellboil for the rest of the fight. This is a fire effect that deals heavy fire damage every second to players standing in it and grows over time.
- Volcanic Disgorge spawns several red swirls on the ground, players should avoid these. When the damage hits a small Hellboil will be left on the ground. These will despawn when Flood of the Firelands is cast.
Tanks
- The boss cannot move, so tanks must make sure to always be in melee range. If no target is in melee range the boss will do massive raid wide damage to wipe the group with Combusting Rage. He will also use Serpent’s Wrath to deal raid wide damage, and buff his damage by 10% every 0.5 seconds.
- The bosses melee swings apply stacks of Molten Venom. This is a debuff that deals fire damage every second, and increases the damage the target takes from Cataclysm Jaws by 50% for 20 seconds. This effect stacks. Tanks will want to taunt swap to keep the stack count low.
- Tanks will need to carefully taunt swap when the boss starts casting Cataclysm Jaws, as the boss will still use melee attacks during the cast. So the off tank will need to have no stacks of Molten Venom, and taunt just before the cast finishes to avoid having the debuff applied and dying to Cataclysm Jaws.
Healers
- The boss pulses raid wide damage every 2 seconds with Burning Vertebrae. Keep this in mind as players take damage from other sources during the fight.
- Focus heal players with Coiling Flames, especially as the dot gets closer to expiring.
- On mythic be ready for heavy damage when Coiling Eruption is about to happen.
- When the bosses’ tail slams on the platform it will deal raid wide fire damage.
- When the boss reaches 100 energy he will cast Serpent’s Fury, this deals heavy fire
Council of Dreams
This is a three boss fight that players can encounter after defeating Igira. The bosses must be damaged down evenly because when one reaches 1% health they start casting Rebirth. If the cast finishes that boss will regain all their health. On Mythic all the bosses will be restored to full health.
Everyone
- When Urctos casts Barreling Charge on the tank, several players must stand in between Urctos and the tank. This will reduce the amount of damage dealt to raid by Thundering Impact. Any players hit will take heavy physical damage, and have a debuff applied that increases their damage taken by the next Barreling Charge by 500% for 30 seconds. So groups should be made to take turns soaking this.
- Aerwynn spawns Noxious Blossoms throughout the area that look like flowers on the floor. These inflict nature damage to all players every 3 seconds until destroyed. Any players standing on a Noxious Blossom will take damage from Corrosive Pollen. This deals heavy nature damage every 0.5 seconds. Players that are ducks can eat these blossoms.
- Aerwynn will target random players with Poisonous Javelin which deals heavy nature damage on impact, and applies a poison dot. This dot deals nature damage every second and reduces the player’s movement speed by 30% for 10 seconds. This effect stacks. Players may want to use a defensive for this if other mechanics are triggering at the same time.
- Pip can cast Emerald Winds for 3 seconds. This pushes all players away and inflicts heavy nature damage, plus additional nature damage every 0.5 seconds for 3 seconds.
- On mythic Whimsical Gusts will also spawn during this cast. These are emerald winds that spawn in the area. Any players hit by it will take heavy nature damage and get knocked back.
- Pip will turn random players into ducks with Polymorph Bomb. Ducks have a buff called Slippery which reduces their nature damage taken by 99%. For abilities they have Quack, Hungry, and Preen. Quack is a dash that increases movement speed by 100% for 6 seconds. Players will have stacks of Hungry applied. If they run over a Noxious Blossom, they will eat it and remove a stack of Hungry. When all stacks are removed they gain Satiated and can cast Preen. Preen will remove the polymorph from the player. However, removing will cast Polymorph Bomb on any players within 7 yds for 12 seconds. So ducks should make sure to stay away from others when they Preen.
- Ducks should be careful not to dispose of all the Noxious Blossoms when Pip is close to 100 energy. This is because when Pip reaches 100 energy it will sing a captivating song that puts an absorb shield on all players. To break this, players must stand on Corrosive Blossoms. Any players that do not break the absorb before the casts finishes will be hit by Captivating Finale. This will stun them, and deal massive nature damage every second for 15 seconds. Captivating Finale will most likely kill any players it effects unless they have an immunity to get out of it.
- When Urctos reaches 100 energy he will go into a Blind Rage for 20 seconds. He will slam the ground dealing physical damage to all players every 2 seconds. Each slam increases his physical damage done by 30% for the duration of the assault. Players will need to interrupt this cast ASAP with a Polymorph Bomb. This will require one player that is a duck to go next to Urctos and Preen themselves, which will cast Polymorph Bomb on him. If it is not interrupted he will gain Ursine Rage permanently. This increases his damage by 500% and will most likely wipe the raid.
- When Aerwynn reaches 100 energy she will cast Constricting Thicket. This conjure vines for 18 seconds that lash out at all players. Players will take nature damage every second and have their movement speed reduced by 7% per stack. Every 3 seconds all players will gain a stack and the effects will increase. If her cast is not interrupted she will trigger Relentless Barrage. This will deal damage to all players every second and poison them. The poison will deal nature damage every 1.5 seconds for 30 seconds and this effect stacks. This ability will likely wipe the raid if not interrupted.
- On Mythic it is possible for 2 bosses to cast their 100 energy abilities at the same time. This makes it much more important to watch the bosses’ energy. A bad overlap could result in a wipe if players are not prepared.
Tanks
- Urctos is the only boss that needs to be tanked. This boss can be moved so tanks should try to position him near Aerwynn or Pip who continuously jump around the area.
- Urctos’ tank swap mechanic is Agonizing Claws. This deals massive physical damage to all players in a frontal cone, so tanks must face the boss away from the raid. Any players hit get a debuff that increases the damage they take from the next Agonizing Claws by 500% for 18 seconds. This effect stacks and tanks should swap after every cast.
- The tank targeted by Barreling Charge must go behind Aerwynn if she is casting Constricting Thicket, or about to cast it. Barreling Charge is the only thing that can stop her cast of Constricting Thicket.
Healers
- Be cautious if too many Noxious Blossoms are active, the more that are up the more raid wide damage there is.
- Spot heal players targeted by Poisonous Javelin. Dispel it if possible on normal and heroic. On Mythic this dot will explode for massive nature damage when Poisonous Javeline expires or is dispelled. Healers will need to coordinate dispels for this, or the raid could wipe to the damage.
- Be ready for raid wide damage during Pip’s Emerald Winds.
- At the end of Urctos’ Barreling Charge he will cast Thundering Impact which deals raid wide damage. This damage is reduced based off how many players were in the charge. Make sure to top off players quickly that soaked the charge, and be ready for high damage if not enough players soaked.
- Watch out for overlaps in abilites. For example, if Urctos is casting Blind Rage at the same time as Emerald Winds then the raid will be taking a ton of damage.
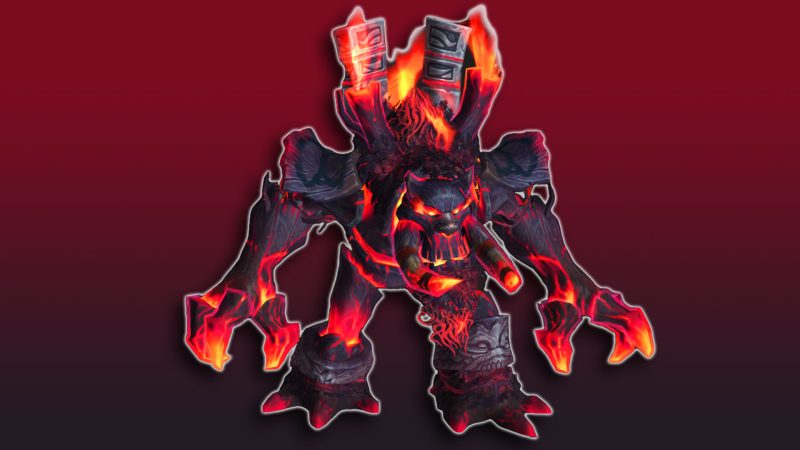
Larodar, Keeper of the Flame
After defeating Volcoross players can confront Larodar, Keeper of the Flame. Let’s take a look at Larodar first, which is a two phase fight.
Everyone
- The Seed of Life is in the middle of the room and players will interact with this later in the fight.
- Players should make sure to get out of the way when Larodar casts Furious Charge. Anyone hit by this will take massive physical damage and get knocked back.
- On heroic players will want to move away from Larodar when he does Furious Charge. This is because he will cast Furious Outburst after reaching his target. This deals massive fire damage to all players, but the damage is reduced the farther you are from the boss.
- Throughout phase 1 the boss will spawn Fiery Treants. These adds will cast Fiery Flourish which deals fire damage to everyone within 12yds. Players should always interrupt this.
- Dps should kill Fiery Treants ASAP. Melee need to watch out because when they die they cast Explosive Bark. This deals heavy fire damage to any players within 3yds when the Fiery Treant dies.
- Larodar will also spawn Scorching Roots during phase 1. These will fixate on a random player and chase them down. These need to be killed ASAP. Any players that touch the Scorching Roots will have Scorching Bramblethorn applied. This is a magic dot that deals fire damage every 2 seconds and roots the player in place for 10 seconds. This can be dispelled.
- On heroic and above Scorching Roots will not be targetable right away. To make them targetable a player will need to click on the Seed of Life to gain Dream Blossom, then they need to stand on the Scorching Roots to make them targetable.
- On heroic and above players that interact with the Seed of Life get Dream Fatigue. This prevents them from interacting with the seed for 4 minutes.
- Players who get Dream Blossom can also use this ability to clear Burning Ground to give the raid more safe space to stand on.
- On heroic and above Blazing Thorns will spawn several swirls in the area that players need to avoid. Anyone hit by these will take heavy fire damage and get knocked back. When they land they form a Blazing Coalescence and head towards Larodar, these look like fire orbs.
- Players will want to soak these orbs because they grant a 20% crit chance buff. However, they do deal a good chunk of fire damage when absorbed, and apply a dot that deals fire damage every 0.5 seconds for 10 seconds. It is not stated that this effect stacks. Players that get benefits from crit should prioritize getting these orbs. What is most important though it to not let any orbs touch the boss. If one does get to the boss he gets a buff that increases his fire damage by 20% for 10 seconds, and for him the buff can stack.
- On mythic getting hit by Blazing Coalescence will apply Everlasting Blaze. This is a debuff that increases the damage of the next Blazing Coalescence by 250%, this effect stacks. Due to this effect, players may want to utilize immunities to clear these orbs.
- When Larodar reaches 100 energy he will cast Raging Inferno. Everyone needs to stand on the Renewed Bramble Barrier or this ability will wipe the raid. Players should get away from this ASAP after the cast, as it will explode afterwards and deal heavy fire damage to anyone near it.
- On mythic players will need to deal with Igniting Growth throughout the fight. Larodar will implant flames inside players for 15 seconds, causing players to create Burning Ground. This effect is reduced when standing next to Burning Ground. Players will need to be more cautious about their positioning so the raid does not get overwhelmed by Burning Ground.
- A short intermission starts at 40% health or after his third cast of Raging Inferno. He starts off by channeling Consuming Flame. While channeling he deals fire damage to all players every 0.5 seconds for 16 seconds and pulls players towards him. Anyone that is within 3yds of the boss will take additional fire damage. Players will want to run away from the boss, and use defensives for this. When the casts ends the boss will transform and start phase 2.
- The boss will spawn treants in this phase, players should cleave them down and remember to stay away from them when they die.
- Falling Embers will occasionally land in the area, shown by red swirls. These must be absorbed by a player or the entire raid will take massive fire damage and have a stack of Searing Ash applied. Players that absorb a Falling Ember will take heavy fire damage so make sure you are not low before soaking one.
- Players with Flash Fire should spread and stay away from others.
- The boss will spawn tornados in the area with Fire Whirl, players should avoid these. Anyone standing in them takes heavy fire damage every 0.5 seconds and gets knocked back.
- On mythic the boss will mark random players with Ashen Devastation. This draws in nearby flames and deals fire damage every second for 8 seconds. When this dot expires the player will explode dealing heavy fire damage to all players. This damage is reduced the further away the player is from the blast. The players who have this dot should use a defensive when it expires. Depending on how many players get this dot at a time, the raid may want to coordinate spots for them to run to.
Tanks
- Off tank should pick up Fiery Treant adds. These do apply a stacking dot called Blistering Splinters. This deals fire damage every second for 15 seconds and stacks.
- When the boss casts Furious Charge the main tank needs to run as far as possible from the boss, as this will reduce the damage the tank takes. When the boss charges the tank, he will deal massive physical and fire damage, and apply Nature’s Fury. This is a debuff that increases the target’s physical damage taken by 100% for 20 seconds. This effect starts at 10 stacks and decreases in stacks over time. The tanks will want to swap after every Furious Charge.
- Watch out for Furious Outburst damage on heroic since the tank will not have enough time to get away from the boss before the damage hits.
- Tanks will need to position the boss carefully when he has stacks of Combusting Presence. This will casue him to leave Burning Ground below him which are patches of fire. If the boss is standing on these fire patches they will grow.
- In phase 2 the tank buster changes to Smoldering Backdraft, and tanks should swap after every cast. This is a frontal cone that should be aimed away from the raid and deals massive fire damage. Players hit by this gain a stack of Smoldering Suffocation. This will be a tricky one for tanks, because this ability will reduce all healing received by 100% and deals heavy fire damage every second for 30 seconds. Additionally, it will leech the health of players within 6yds. So the only way to get healed will be to stand next to other players.
Healers
- Heal up Charred Treants ASAP so they can become Renewed Treants and start healing the Seed of Life.
- On heroic make sure to spot heal players with Blazing Coalescence.
- On heroic and above watch the raid’s health after Furious Charge.
- Heal up Renewed Treants as they sacrifice their life to heal the Seed. Eventually they will die as their maximum health gets smaller over time.
- Heal up Charred Brambles before Raging Inferno is cast. These brambles only expire after Raging Inferno goes off, so there is no need to hold back on healing them. When healed they turn into Renewed Brambles to help protect the raid from Raging Inferno.
- Watch the raid’s health during Raging Inferno, the Renewed Bramble Barrier only reduces the damage from this by 90% so the raid will still take some damage during this cast.
- After each cast of Raging Inferno, the boss gains a stack of Combusting Presence. This will pulsate fire damage to the entire raid every 1.5 seconds.
- Healers will want to use cooldowns during Consuming Flame as there will be a lot of damage going out quickly.
- In phase 2 make sure to top off the tank before Smoldering Backdraft goes off.
- Larodar will pulsate fire damage every second in this phase. Every 12 seconds he will gain a stack of Searing Ash which increases the pulsating fire damage.
- Larodar will cast Flash Fire on random players, this is a healing absorb that lasts 8 seconds. When Flash Fire expires the player will explode for heavy fire damage and also hit anyone within 8 yds. If the healing absorb is still on them, then the player and anyone they hit will become Encased in Ash. This will stun the player for 10 seconds but can be dispelled. Healers need to heal this absorb off ASAP.
- On mythic watch the raid when Ashen Devastation dots are expiring. If someone with this dot is too close then the raid will take a lot more damage than normal.
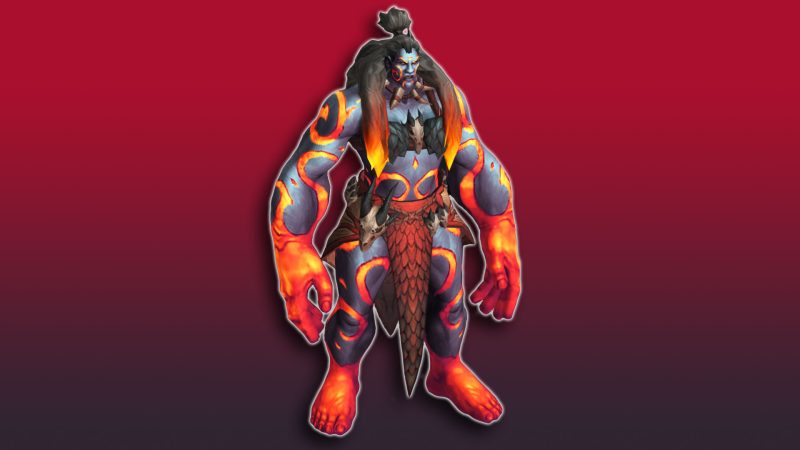
Nymue, Weaver of the Cycle
Nymue is the boss players can face after defeating Council of Dreams. This is a two phase fight, let’s take a look at how it works.
Everyone
- There is an add phase later in the fight, players should coordinate who goes left side and who goes right side before starting the fight.
- The boss area will have several glowing lines separating the platform, this is the Verdant Matrix. Anyone who passes these lines will take nature damage every 0.5 seconds for 2 seconds, and this effect stacks. So if you need to cross them be cautious of how many lines you pass through.
- Surging Growth will spawn green flowers on the floor with circles around them. These pulsate nature damage every 2 seconds for 1 minute. But if a player stands on them their duration will be greatly reduced. So players should stand on these if possible to prevent too many from spawning.
- On mythic, Nymue will also spawn Ephermal Flora. After 10 seconds the flora will start exploding dealing heavy nature damage to all players every second for 30 seconds. Players who stand on the flora stifle it, reducing its life force by 0.20% every 0.5 seconds. To get rid of this flora faster more players should stand on it ASAP.
- On mythic, Reclamation will trigger 3 seconds after Surging Growth or Ephermal Flora expires. This causes the area with the Surging Growth or Ephermal Flora to explode, dealing masssive nature damage to anyone within 10 yds. Players should make sure to run away from these spots after clearing them.
- Impeding Loom are green beams that slowly move outwards from the boss. Anyone hit is stunned gets a dot that deals heavy nature damage every second for 3 seconds. Players need to avoid these.
- When the boss reaches 100 energy it will cast Full Bloom which puts a large circle on the ground near the boss. Anyone standing inside will take massive nature damage and gain inflorescence. Only the tanks should get hit by this.
- Nymue will spawn a Cycle Warden on the left side of the room, and one on the right side of the room. The raid should split into their two groups to kill these adds. Groups should follow their tanks to the appropriate side.
- During phase 2 the boss takes 99% reduced damage, so there is no reason to keep attacking Nymue.
- On heroic and up Lumbering Slam from Cycle Wardens will cause Surging Growth, which is exactly like the Surging Growth from phase 1. Players should make sure to get rid of Surging Growth ASAP, and remember to stifle it still if any is remaining after the add is killed.
- When the Cycle Warden dies it will trigger a Radial Flourish that deals heavy nature damage to anyone hit. This is most likely a ground effect of some kind, so avoid standing in anything bad.
- When both Cycle Wardens are killed phase 1 will resume.
- On mythic as soon as one Cycle Warden is killed, players have 15 seconds to kill the second one. After 15 seconds a Verdant Rend will trigger and wipe the raid. If anyone somehow survives then Verdant Rend will continue to trigger once every 15 seconds.
- On mythic an add called Manifested Dream will also spawn and start casting Waking Decimation for 30 seconds. If this cast goes off it will wipe the raid. Anyone within 30 yds of the Manifested Dream takes nature damage every second from Lucid Miasma and has Lucid Vulnerability applied for 12 minutes. This debuff increases Lucid Miasma damage by 1,000% per application. It is not mentioned in the dungeon journal how often Lucid Vulnerability stacks while in Lucid Miasma. Depending on how tough the mob is, players will need to take turns having groups go to kill this mob.
- The Manifested Dream will cast Dream Exhaust which is a frontal cone. Players should avoid this as it deals heavy nature damage.
Tanks
- Threaded Blast is her tank buster that deals heavy physical and nature damage.
- Weaver’s Burden is a dot that deals nature damage every second for 12 seconds and puts a large circle around the player. Other players within the circle will also take damage from the dot. When Weaver’s Burden expires the player gains Inflorescence.
- Inflorescence leaves a safe path of ground beneath your feet. Use this to create a safe path for players to follow you through. It will be important to use this when the adds spawn to allow everyone to safely get to the area where the adds are. Players that walk on this path will be safe from the Verdant Matrix and have their movement speed increased by 60%. This effect lasts for 4 seconds.
- When the boss casts Full Bloom stand in the ground effect to gain Inflorescence, then go to your assigned side.
- On heroic and above, Woven Resonance will be applied when Weaver’s Burden expires. This increases damage taken by 100% for 20 seconds. Make sure the tank with this debuff is not tanking when the boss casts Threaded Blast. When Woven Resonance expires a Barrier Blossom will spawn on the ground. The dungeon journal says this can spread to other players. This probably means anyone inside the green circle from Weaver’s Burden will also get Woven Resonance. So it is more important that no one else gets hit by this on heroic and up.
- Barrier Blossoms are emerald flowers with large circles around them. Any players that step in them take nature damage and are knocked back. These may last for the entire fight, so tanks will need to place them carefully.
- Make sure to tank the Cycle Warden within the area they spawn at. They cannot cross the Verdant Weave, doing so will trigger Verdant Rend which will wipe the raid.
- Tanks should face Lumbering Slam from the Cycle Wardens away from the group. This is a frontal cone that deals massive nature damage to anyone hit.
Healers
- If too many Surging Growths have spawned the raid will be taking higher ticking damage.
- Continuum alters the Verdant Matrix for 10 seconds, causing everyone to take heavy nature damage every second.
- Spot heal players targeted by Viridian Rain, as the dot deals heavy nature damage every 1.5 seconds for 6 seconds.
- On mythic watch out for Ephermal Flora, if multiple spawn the raid will be taking heavy nature damage until they are taken care of.
- At 100 energy the boss casts Full Bloom, make sure to top off the tanks before they soak this.
- Throughout phase 2 Nymue will cast Unravel which deals raid wide nature damage every 3 seconds, and places a debuff on everyone that increases damage taken from Unravel by 10%. This effect stacks. Depending on how long this phase goes on for, players may want to save some cooldowns for this part.
- On mythic, the Manifested Dream group will probably take the most damage and may need defensives or cds to stay alive.
Smolderon, the Firelord
Players must defeat Larodar and Nymue before they can face Smolderon. This boss alternate between two phases throughout the fight.
Everyone
- At the start of the fight random players have Overheated applied. These players should spread from others, as they will pulsate fire damage every 2 seconds for 10 seconds to everyoine within 10 yds. When this dot expires it explodes dealing fire damage to players within 5 yds.
- On heroic and up, Flame Waves will shoot out of players when Overheated expires. Anyone hit by this takes heavy fire damage and gets knocked back.
- When the boss casts Brand of Damnation, players without Overheated should stack on the tank to soak this. Or there should be designated groups assigned to each soak. If this ability fails to hit at least 4 players then everyone takes heavy fire damage and the boss gains a stack of Heating Up. Players hit by Brand of Damnation are afflicted with Cauterizing Wound and Emberscar’s Mark.
- Cauterizing Wound is a healing absorb shield, and when it is removed it triggers an explosion 4 second’s later at the player’s current location. Players with this debuff should position accordingly to drop the explosion in a safe place.
- Emberscar’s Mark increases damage taken by Brand of Damnation by 500%. Being struck by Devour Essence will remove this effect.
- Lava Geysers will spawn swirls at random players locations, which will erupt with lava. Anyone hit by this will take heavy fire damage and get knocked back. Then a pool of Smoldering Ground will be left behind. Players need to watch their positioning so that these Smoldering Ground pools are not in a bad spot. These remain for the rest of the fight, so they must be placed carefully to conserve space.
- On mythic he will cast Seeking Inferno which fixates on random players. If a player touches a Seeking Inferno they gain Inferno. This is a dot that deals fire damage every second for 4 seconds. If a Seeking Inferno reaches its target, or 30 seconds have passed, it explodes dealing heavy fire damage to the raid. This explosion causes all players to take 500% increased damage from Seeking Inferno for 3 seconds. So players will want to make sure to kill these before they explode.
- Phase 2 starts when the boss reaches 100 energy, he will cast Heating Up which increases his damage by 10% per stack. After Heating Up 4 times he will cast Encroaching Destruction which continuously triggers World of Flames until all players are dead.
- Devour Essence is cast next, and Smolderon will run to the middle of the room. This will cause everyone with Emberscar’s Mark to release a Living Flame. This is a fire orb that will slowly move towards the boss. Everyone should absorb their own Living Flame, doing so inflicts some fire damage. If it touches the boss it will permanently increases his damage done by 3% per stack.
- Players that absorb a Living Flame gain Ignited Essence. This increases their damage done by 20% and healing done by 10% for 20 seconds. This effect stacks, but collecting additional flames does not extend its duration. It may be worth it to feed certain classes more stacks of this buff. Dps should save their cooldowns for this phase.
- Throughout phase 2 the boss will highlight sections of the platform with World in Flames. Anyone standing in these sections when it bursts into fire will take heavy fire damage and have Lingering Burn applied. Players should make sure to avoid standing in the glowing sections of the platform.
- Lingering Burn is a dot that deals heavy fire damage every second for 10 seconds, and it can stack.
- When the World of Flames cast is finished he will return to phase 1 mechanics.
Tanks
- The tank buster is Brand of Damnation, active mitigation should be used even though this is a soak. As the boss does extra damage to the targeted tank.
- On heroic and above the tank targeted by Brand of Damnation will have Searing Aftermath applied. This causes the tank to explode after 6 seconds, dealing massive fire damage to all players. The tank will want to run as far as possible from the group ASAP, as it deals less damage the further players are from the tank.
Healers
- Spot heal players with Overheated dot.
- Make sure to top off players that are soaking Brand of Damnation.
- Heal off the Cauterizing Wound absorb shield on players, but make sure they are in a safe spot first.
- The boss pulses fire damage to all players every 3 seconds with Blistering heat. This ticking damage can overlap with other abilities so keep an eye on player’s health.
- During phase 2 the boss will have Blazing Soul, which increases the frequency of Blistering Heat to trigger every 1 second instead of every 3 seconds.
- On heroic and up, Blazing Soul will increase the damage of Blistering Heat by 50% for 30 seconds. So healers will need to coordinate cooldowns here, especially if the boss has multiple stacks of Heating Up.
Tindral Sageswift, Seer of the Flame
This is a three phase fight that makes use of dragon riding. Let’s take a look at the mechanics.
Everyone
- Mass Entanglement will target all players and puts a small circle around then. After 6 seconds roots will spawn on all players and inflicts fire damage to them and anyone within 3yds. These roots continue to inflict fire damage every second until destroyed. To make these roots easier to kill, the group should stick together but not stack so tightly that they cleave each other with fire damage.
- On mythic, if a root fails to root a player or is removed before it is killed, then a Scorched Treant will spawn. This add will pulsate raid wide fire damage every second until killed.
- Falling Stars will rain down on the platform throughout the fight, where they will land is shown by blue swirls. Any players hit by these take astral damage. When the star lands it bursts into Star Fragments. These are shown by smaller swirls that also damage anyone standing on them.
- Fiery Growth is a dot applied to random players that deals fire damage every second for 40 seconds. When it is dispelled or expires a large pool of Scorching Ground drops at the player’s location. The player with this dot should move out of the group so they can drop it in a safe place.
- Melee DPS should watch out for Blazing Mushrooms, let the tanks soak these.
- If a player is too close to the edge of the platform they get blasted by Flame Surge, which deals heavy fire damage every second. This is to keep players within the area during the fight.
- When the boss enters Moonkin form he will cast Fire Beam, which creates two large swirls in the area that explode after a few seconds. Anyone caught in the initial blast will take heavy fire damage. Then several Fire Beams will spawn and move around the platform. Players should avoid getting hit by these, anyone who is hit takes heavy fire damage every second.
- On heroic and up even more Fire Beams will spawn after the initial impact.
- When he reaches a certain health % he will turn into an Owl and cast Typhoon which pushes back all players. Make sure to not get pushed off the platform. Then the boss will fly to the next platform. Players need to pick up a feather Tindral left behind to enable dragonriding.
- Tindral will fly to the next platform, when he lands he starts casting Supernova for 20 seconds. This shields himself for 4% of his maximum health and deals fire damage to all players every 2 seconds. Players must get to him, break the damage absorb, and interrupt Supernova before the cast finishes. If the cast goes off he wipes the raid. There is something players can do to break the shield faster.
- As players dragonride to follow Tindral, there are green orbs floating in the air. Collecting these will give everyone a buff that increases their damage and healing by 5% per stack. This effect lasts until Supernova finishes casting or is interrupted. DPS should plan their cooldowns accordingly to line up for this damage absorb shield.
- While draonriding players should look out for red orbs, as flying into these will deal fire damage and remove 1 Vigor. There will also be gusts of wind players can use for a boost in speed.
- On the second platform the boss will transform into a Burning Treant which gives him Suppressive Ember and Flaming Germination.
- Players should look out for Seeds of Flames that spawn during Flaming Germination. Where they will spawn is shown by several orange swirls. All seeds should be crushed by players, which can be done by walking over them. Doing so will deal some fire damage to the player.
- On heroic and up players that step on a seed get a debuff that increases the damage they take from Seed of Flame by 50% for 6 seconds and stacks. Players should be cautious of this when removing seeds from the area.
- Once he reaches a certain health % he will fly to the final platform and start casting Supernova again. On this last platform he will cycle between Moonkin form and Treant form. Players will need to kill him before he casts Supernova again.
Tanks
- Searing Wrath applies a dot to the tank that deals fire damage every 2 second for 20 seconds and stacks. Tanks should swap when the damage from the dot feels like it is too much to handle.
- The boss creates a Blazing Mushroom around himself every 3 seconds for 9 seconds. Each mushroom erupts after 3 seconds inflicting heavy physical and fire damage to players within the area. Any player hit get s a debuiff applied that increases their damage taken from Blazing Mushrooms by 200% for 3 seconds. If Blazing Mushrooms fails to hit a player then the entire raid takes heavy fire damage. Tanks should take turns soaking these mushrooms due to the 200% increased damage debuff.
- On mythic he will also create Poisonous Mushrooms which hit a lot harder. These will spawn every 3 seconds for 9 seconds, and each will erupt after 3 seconds. Players that run into this will take deadly physical damage and heavy nature damage, and get a debuff that increases damage taken from Poisonous Mushrooms by 500% for 3 seconds. If a Poisonous Mushroom fails to hit a player it will deal heavy nature damage to the entire raid every 0.5 second for 10 seconds. This would probably result in a wipe. Tanks will need to coordinate soaking these mushrooms as well, and will definitely need active mitigation or defensives for the damage.
Healers
- Coordinate dispels of Fiery Growth so that Scorching Ground is not dropped at a bad time, or in a bad spot.
- On mythic, when Fiery Growth is dispelled it puts Lingering Cinder on all players. This deals fire damage every second for 3 seconds, and each additional stack of Lingering Cinder increases its damage by 2,000%. So it is important for every dispel to be coordinated or the raid will wipe.
- When the boss enters Moonkin form he will do periodic raid damage with Sunflame.
- When the boss enters Treant form, quickly heal players with Suppressive Ember. Depending on how this healing absorb shield is applied, cooldowns may be needed to ensure players survive other incoming damage.
- Flaming Germination inflicts fire damage to all players every second for 15 seconds and plants Seeds of Flames around the area. If a seed is left alone for 10 seconds it sprouts into a Flaming Tree. This will deal fire damage to all players every 2 seconds for 6 seconds. If multiple trees are up there will be a lot of raid wide damage.
Fyrakk, the Blazing
Disclaimer, all this information is from the dungeon journal. Since no testing has been done for Fyrakk we have not seen his abilities in action yet. This is a three phase fight with one intermission.
Everyone
- There will be Roots of Amirdrassil in the area that must be protected from Fyrakk. If Raging Flames reach the roots, then the tree will die and the encounter ends.
- Firestorm will spawn several meteors into the area, which will most likely be shown by swirls. Any players hit by these will take shadowflame damage. Where the meteors land will leave behind Raging Flames.
- Wildfire will cause Raging Flames to spread, where they will spread will most likely be shown by swirls. Any players hit by these will take Shadowflame damage.
- Raging Flames is a patch of fire on the ground that deals shadowflame damage to anyone standing inside it.
- Dream Rend will open a portal to the Firelands and suck players in. All players need to run away from this, the farther a player is the less damage they take. Any player sucked into the portal will instantly die.
- On mythic the portal will have flames escaping from it, these could move across the platform or be swirls on the ground. Any players hit by this will be killed, as it deals 1.6 million shadowflame damage.
- On heroic and up Fyrakk will cast Blaze on random players. When the debuff expires flames will explode outwards from them inflicting shadowflame damage to any players caught in the effect. I imagine this to be lines of fire shooting out of the player. This ability will continue to be cast in phase 2 and 3.
- On mythic Fyrakk will spawn Darkflame Shades from Raging Flames. These adds will do a cleave that must be split evenly among multiple players. If not enough players soak then it will kill its target. Any players that get hit gain a debuff that increases their damage taken from Darkflame Cleave by 200% for 4 seconds. Players will need to arrange soak groups for this.
- Darkflame Shades will also cast Hyr’alath’s Flame which shoots a fireball in front of them, players should move out of the way of this.
- When Intermission starts, Fyrakk will attempt to assault Amirdrassil with corrupting flames. Fyrakk will use Corrupt to put a damage absorb shield equal to 6% of his max health. DPS will need to save cooldowns for this to burn the absorb shield. After 30 seconds Fyrakk will succeed and the encounter will end.
- During the intermission Fyrakk casts Shadowflame Breath, anyone standing in this will take shadowflame damage every 0.3 seconds and quickly die if they do not get out.
- Incarnate is an ability probably casts when the absorb shield is broken. Fyrakk will five onto the platform dealing physical damage to all players and knocking them up.
- Shadowflame orbs will move towards Fyrakk from Raging Flames. If a player touches these they take shadowflame damage. If Fyrakk touches them it will cause Shadowflame Eruption which can wipe the raid. So players should make sure to absorb all the orbs.
- On mythic Fyrakk will create Flame Orbs and Shadow Orbs instead from Raging Flames that move towards him. Similar to Shadowflame Orbs, if any orb hits Fyrakk he will do a ton of damage and probably wipe the raid.
- Players that touch a Flame Orb will take heavy fire damage and have Flamebound applied. This increases damage from Flame Orbs by 30% and dmaage from Shadow Orbs by 500%, this effect stacks. If someone touches a Shadow Orb they take heavy shadow damage and have Shadowbound applied. This makes them take 30% more damage from Shadow Orbs and 500% more damage from Flame Orbs, this effect stacks. So players will want a Fire Orb and Shadow Orb group to manage soaking these. There is no duration mentioned so these debuffs probably last for the entire phase.
- Next Phase 2 will start. Fyrakk will cast Greater Firestorm which is similar to Firestorm but does more damage and summons a Burning Colossus. DPS must kill this colossus before it reaches 100 energy or its core will explode and could wipe the raid.
- On mythic the Burning Colossus will put Molten Eruption on random players. This effect erupts after 5 seconds dealing heavy fire damage to the player. These players need to run to players stunned by Shadow Cages to free them.
- On mythic the Dark Colossues will shroud several players in shadows that erupt after 4 seconds, inflicting heavy shadow damage to them and anyone within 5yds. Players within the eruption are stunned and suffer shadow damage every 2 seconds. This stun is probably permanent, as no duration is stated and Molten Eruption is said to break Shadow Cages. The Dark Colossus also has the Exploding Core ability, so it cannot be allowed to live for too long.
- Flamefall is an ability where Fyrakk will crash into the platform, this will most likely be represented by a circle or swirl. Anyone at the point of impact will die. Players farther away from the impact will take less damage.
- Fyrakk will fly across the platform and unleash Shadowflame Devastation which can kill players caught in it. This deals shadowflame damage and additional damage every 2 seconds to anyone standing in the fire. This will probably be similar to Deep Breath from Forgotten Experiments, just make sure to not be standing in the targeted area of the platform.
- Screaming Soul adds unleash screams that increases its damage done by 20% per stack. Nearby Spirits of Kaldorei will despair and also become Screaming Souls. DPS will want to quickly kill these souls to prevent them from spreading. If possible, players will want to move them so they do not turn any Spirits of Kaldorei.
- In phase 3 the tree will bloom, and seeds will form that players can carry. These seeds will surge with power occasionally, causing any seeds held by players to Bloom. Seeds become Blazing Seeds if hit by shadowflame, so players must move seeds to avoid this.
- When a seed blooms it will grant all players within 9 yds an absorb shield for 6 seconds. Players will want to use these carefully during the phase.
- Blazing Seeds will pulsate shadowflame damage for 6 seconds and probably despawn after that.
- On mythic, Amirdrassil will also create corrupted seeds which apply corruption every second while being held. This corruption is a dot that deals shadowflame damage every 2 seconds for 30 seconds, and this effect stacks as long as the player holds the seed. Seeds will pulsate with fire while left on the ground, and become blazing seeds if hit by shadowflame. It is unclear if there is a way to cleanse the corrupted seeds or remove them.
- On mythic Blazing Seeds deal 1.6 million damage to all players every second for 6 seconds so no seed can ever get hit by shadowflame or it is a wipe.
- Fyrakk will cast Eternal Firestorm which will create ground effects that players will want to avoid. Where the meteors land will spawn a Swirling Firestorm. These firestorms will probably be like fire tornados, and deal damage to any players inside as well as knock them back. Players will need to watch these swirls, and pick up any seeds that would get hit by them.
- Apocalypse Roar is a deadly mechanic that deals deadly shadowflame damage to all players and pushes them back. Also places a dot on all players that deals Shadowflame damage every second for 12 seconds. This is the mechanic that players should use the Bloom effect for, as the absorb shield from Bloom will negate the majority of this damage.
- Shadowflame Breath is a frontal cone Fyrakk will cast, players need to move ASAP to avoid this. It will deal heavy shadowflame damage every 0.3 seconds to players caught inside.
Tanks
- Fyrakk’s tank buster is Fyr’alath’s Bite. This deals heavy physical and shadowflame damage, and brands the target with Fyr’alath’s mark for 40 seconds. This ability also sends forth Fyr’alath’s Flame.
- Fyr’alath’s Mark causes Fyrakk’s melee attacks to deal additional shadowflame damage, and this effect can stack. Tanks will need to coordinate when to tank swap.
- Fyr’alath’s Flame sends a fireball from Fyr’alath that deals shadowflame damage to enemies in its path. This sounds like a frontal ability that can be aimed away from the raid. It may be similar to Kokia Blazehoof’s Molten Boulder ability.
- Predator is an ability that cause Fyrakk to leap at his current target if not within reach, and then he inflicts a melee attack with Fyr’alath. This indicates that Fyrakk may not be moveable in phase 1, or very difficult to move. If tanks have to move him they will get hit by this.
- On mythic tanks will need to manage Darkflame Shade adds.
- In phase 2 a tank needs to pick up the Burning Colossus. It has a tank buster called Molten Gauntlet that deals physical damage and shadowflame damage. This should be tanked away from the tree as it does pulsate fire damage that could hurt the tree or the spirits.
- Tanks will need to deal with Fyrakk in phase 2.
- On mythic in phase 2 a Dark Colossus will also spawn and needs to be tanked. It has a tank buster called Shadow Gauntlet that deals heavy physical and shadowflame damage.
- In phase 3 Fyrakk’s tank buster changes to Infernal Maw. He will devour his current target inflicting massive physical damage and additional damage every second. This effect stacks, and since there is no duration listed it probably lasts for the rest of the fight. So tanks will need to carefully manage this.
Healers
- Fyrakk will pulsate fire damage to all players every 2 seconds with his Burning Presence and occasionally afflict them with Aflame. This dot deals shadowflame damage every second and grows in intensity over time, this effect does stack. Healers will want to dispel this to keep player stacks at a manageable level. This effect remains throughout the entire fight.
- Wildfire will deal raid wide shadowflame damage.
- Dream Rend will deal massive shadowflame damage to any players close to the portal. Raid damage may be high at this point. Cooldowns may be needed if the portal spawns too close to the raid.
- During Intermission while Fyrakk has his damage absorb shield active, he will pulsate shadowflame damage every second to all players. This effect increases in intensity over time, depending on how intense healers may need to use cooldowns to keep everyone alive.
- Make sure players are topped off before Incarnate hits.
- Look out for Shadowflame Orbs, if one touches Fyrakk he will deal shadowflame damage to all players. Then he will deal additional shadowflame damage every second for 24 seconds. This effect can stack, so the damage increases the more orbs that touch Fyrakk.
- Fyrakk’s Burning Scales deal raid wide shadowflame damage every 2 seconds. This effect will continue in phase 2 and phase 3.
- When phase 2 starts Spirits of the Kaldorei will emerge, healers must heal these spirits to full health ASAP to activate Lifeforrce Barrier. This is an absorb shiled that reduces all damage taken by 99% on the spirit. These spirits will move towards Amirdrassil and heal the tree.
- On mythic healers will need to heal a Darnassian Ancient as well.
- Bunring Colossus will pulsate shadowflame damage to all enemies within 15 yds every 2.5 seconds.
- On mythic the Dark Colossus also has pulsing core and exploding core, so look out for raid wide damage from that add as well.
- Look out for Exploding Core from colossus if it reaches 100 energy. This will deal massive shadowflame damage to the raid, and additional shadowflame damage every second for 20 seconds. This will most likely result in a wipe if it goes off.
- Screaming Soul adds will deal shadowflame damage to all players every 3 seconds, and their damage increases over time. Be ready for heavy raid damage if these adds are living for too long.
- In phase 3 Blazing Seeds will deal raid wide damage, while one is not a problem if too many seeds get burned it could be unhealable.
- Healers may need to use healing cds for Apocalypse Roar, it depends on effective the absorb shield from the seeds will be.
- SEO Powered Content & PR Distribution. Get Amplified Today.
- PlatoData.Network Vertical Generative Ai. Empower Yourself. Access Here.
- PlatoAiStream. Web3 Intelligence. Knowledge Amplified. Access Here.
- PlatoESG. Carbon, CleanTech, Energy, Environment, Solar, Waste Management. Access Here.
- PlatoHealth. Biotech and Clinical Trials Intelligence. Access Here.
- Source: https://estnn.com/amirdrassil-the-dreams-hope-boss-guide-tldr-edition/
- :has
- :is
- :not
- :where
- $UP
- 000
- 1
- 10
- 100
- 12
- 15%
- 16
- 160
- 20
- 24
- 30
- 40
- 7
- 8
- 9
- a
- abilities
- ability
- About
- above
- accordingly
- across
- Action
- activated
- active
- add
- Additional
- Additionally
- Adds
- afflicted
- After
- after surging
- aftermath
- afterwards
- again
- aim
- aimed
- AIR
- alive
- All
- allow
- allowed
- alone
- also
- always
- among
- amount
- an
- Ancient
- and
- Another
- any
- anyone
- anything
- appear
- Application
- applied
- applies
- Apply
- appropriate
- ARE
- AREA
- around
- AS
- assault
- assigned
- At
- attack
- Attacking
- Attacks
- attempt
- auto
- avoid
- avoided
- away
- back
- Bad
- barrage
- barrier
- based
- BE
- Beam
- because
- become
- been
- before
- behind
- being
- below
- benefits
- between
- Big
- BLADE
- BLAZING
- blind
- Bloom
- Blossom
- Blue
- bomb
- boost
- BOSS
- bosses
- both
- Both Sides
- brand
- brands
- Break
- Breath
- Brings
- Broken
- brown
- buff
- burden
- burn
- burned
- burning
- but
- by
- cages
- called
- CAN
- cannot
- captivating
- care
- careful
- carefully
- carry
- casting
- caught
- Cause
- causes
- causing
- cautious
- CDS
- certain
- Chance
- change
- Changes
- Channel
- charge
- charges
- chase
- Choose
- Circle
- circles
- classes
- clear
- Clearing
- click
- Close
- closer
- closest
- coalescence
- Collecting
- coming
- consuming
- continue
- continuously
- controlled
- coordinate
- coordinated
- Core
- corrupt
- corrupted
- Corruption
- could
- Council
- cover
- Crash
- create
- creates
- Cross
- cultivation
- Current
- cycle
- damage
- Dark
- Dash
- dead
- deal
- dealing
- Deals
- dealt
- decreases
- deep
- defeating
- defensive
- definitely
- Depending
- depends
- designated
- despair
- destroyed
- determined
- devastation
- Die
- difficult
- Difficulty
- dispose
- do
- does
- doing
- done
- doom
- DOT
- down
- Dragon
- draws
- dream
- dreams
- Drop
- dropped
- Drops
- due
- duration
- during
- Dying
- each
- earth
- easier
- eat
- Edge
- edition
- effect
- Effective
- effects
- either
- else
- Emerald
- emerge
- enable
- encounter
- end
- ends
- enemies
- energy
- enough
- ensure
- entanglement
- Enter
- entering
- Enters
- Entire
- equal
- especially
- essence
- Even
- evenly
- eventually
- EVER
- Every
- everyone
- exactly
- example
- experiments
- Explodes
- explosion
- extend
- extra
- eye
- Face
- fails
- Falling
- false
- far
- faster
- fatigue
- Feet
- few
- fight
- final
- finale
- Finally
- Fire
- fires
- Firestorms
- First
- five
- Flash
- floating
- flood
- Floor
- flourish
- flying
- follow
- For
- Force
- forge
- forgotten
- form
- forth
- Free
- Frequency
- from
- front
- full
- further
- Gain
- Gains
- gathering
- Gauntlet
- get
- getting
- Give
- gives
- Go
- Goes
- going
- gone
- good
- grant
- greater
- greatly
- Green
- Ground
- Group
- Group’s
- Grow
- Grows
- Growth
- guide
- handle
- happen
- happens
- harder
- Have
- having
- he
- head
- heads
- healing
- Health
- Heart
- heavy
- Held
- help
- her
- here
- High
- higher
- Highlight
- him
- himself
- his
- Hit
- Hits
- hold
- holds
- hope
- How
- However
- HTTPS
- Hungry
- Hurt
- i
- if
- igniting
- imagine
- immune
- immunity
- Impact
- important
- importantly
- in
- inactive
- Incoming
- Increase
- increased
- Increases
- increasing
- indicates
- Inferno
- inflict
- information
- initial
- inside
- instantly
- instead
- interact
- interacting
- interrupted
- into
- IT
- ITS
- jaws
- journal
- jpg
- jump
- just
- Keep
- Kill
- killing
- Kind
- Knocking
- lake
- Land
- lands
- large
- Last
- later
- LAVA
- Leap
- least
- Leave
- left
- less
- let
- Level
- Life
- like
- likely
- Line
- lines
- Listed
- live
- living
- location
- locations
- Long
- Look
- look like
- loom
- Lot
- Low
- lucid
- made
- magic
- Main
- Majority
- make
- MAKES
- manage
- manageable
- many
- mark
- marked
- massive
- Matrix
- max
- max-width
- maximum
- May..
- mean
- means
- mechanics
- mentioned
- Middle
- million
- mind
- minute
- minutes
- mitigation
- more
- most
- move
- moved
- movement
- much
- multiple
- must
- Nature
- Near
- Need
- needed
- needs
- New
- Newest
- next
- no
- None
- normal
- nothing
- occasionally
- of
- off
- often
- on
- once
- ONE
- only
- onto
- open
- or
- Orange
- ORBS
- order
- Other
- Others
- out
- over
- overwhelmed
- owl
- own
- part
- pass
- passed
- passes
- Patch
- Patches
- path
- per
- periodic
- permanent
- permanently
- person
- phase
- physical
- pick
- Place
- placed
- Places
- plan
- plants
- platform
- plato
- Plato Data Intelligence
- PlatoData
- player
- players
- plus
- Point
- poison
- Pollen
- pool
- Pools
- Portal
- position
- positioning
- possible
- power
- prepared
- presence
- prevent
- prevents
- Prioritize
- probably
- Problem
- protect
- protected
- Pulls
- pushed
- pushes
- put
- Puts
- Quick
- quickly
- Rage
- raging
- raid
- RAIN
- random
- range
- reach
- Reaches
- reaching
- ready
- reason
- received
- Red
- reduce
- Reduced
- reduces
- reducing
- regain
- release
- relentless
- remain
- remaining
- remains
- remember
- remove
- Removed
- removing
- renewed
- represented
- require
- resonance
- REST
- restored
- result
- resume
- return
- returning
- Rid
- riding
- right
- rising
- Room
- root
- roots
- Run
- running
- s
- sacrifice
- safe
- safely
- Said
- same
- sap
- Save
- says
- scales
- screaming
- screams
- Second
- seconds
- sections
- see
- seed
- seeds
- seeking
- seen
- sends
- separating
- several
- Shadow
- she
- Shield
- Shoot
- shooting
- Short
- shot
- should
- shown
- side
- Sides
- similar
- since
- Slams
- Slowly
- slows
- small
- smaller
- So
- some
- somehow
- Someone
- something
- song
- Soon
- Soul
- Sources
- Space
- Sparks
- Spawn
- special
- speed
- spirit
- split
- Spot
- spots
- spread
- Spreading
- stack
- stacking
- Stacks
- stand
- standing
- stands
- Star
- Stars
- start
- Starting
- starts
- stated
- stay
- Step
- Stick
- stifle
- Still
- Stop
- strike
- succeed
- Summons
- supernova
- sure
- surge
- surging
- survive
- swap
- Swing
- Swings
- swirl
- Switch
- sword
- Take
- taken
- takes
- taking
- tank
- Tanked
- Tanks
- Target
- targeted
- targets
- Testing
- than
- that
- The
- The Area
- the world
- their
- Them
- themselves
- then
- There.
- These
- they
- thing
- Third
- this
- though?
- three
- Through
- throughout
- ticking
- tightly
- time
- times
- to
- together
- Ton
- too
- top
- topped
- touch
- touches
- tough
- towards
- Transform
- transitions
- travel
- tree
- Trees
- trigger
- triggering
- try
- TURN
- turns
- Twice
- two
- unclear
- under
- unleash
- unravel
- until
- use
- used
- utilize
- Venom
- very
- vulnerability
- wait
- walk
- walking
- want
- Watch
- Wave
- waves
- Way..
- we
- Weapons
- Weave
- WELL
- were
- What
- What is
- when
- whenever
- which
- while
- WHO
- wide
- will
- wind
- winds
- wipe
- with
- within
- without
- works
- world
- worth
- would
- woven
- WoW
- yet
- you
- Your
- zephyrnet