The second Variant Dungeon is out, this one taking us to the remote mountains of Hingashi to deal with all manners of demons and ghosts with everyone’s favorite NPC, Hancock. Doesn’t that sound like so much fun? No? Perhaps the rewards and gorgeous scenery will tempt you instead. Here’s a thorough Mount Rokkon dungeon guide.
Mount Rokkon full dungeon Guide: Start and unlock
The starting quest is ‘Mononoke Aware’, picked up from Shallow Moor in Old Sharlayan (12.0, 13.3). You must have base Endwalker complete, as per last time. A few cutscenes later full of exposition, you’ll be in Kugane with Hancock and with the duty finder for Mount Rokkon unlocked. Now it’s time to venture out.
Variant Dungeon tips and tricks
Being a variant dungeon over a regular dungeon, you do not need four people to do Mount Rokkon. The mobs will all scale HP to the amount of players on each run. However, here are some general rules for climbing the mountain.
Tanks and Healers should always have Variant Spirit Dart as their first action. Spirit Dart is now part of your rotation in order to optimize DPS. As an OGCD (Off-global Cooldown), Spirit Dart is meant to be woven between your regular attacks. It does far more damage than your normal attacks, so don’t wait for the DoT to run out. Just spam it until the boss is dead.
DPS’ two actions will vary per composition, but as general rules:
- Red Mage and Summoner: Variant Cure and Variant Rampart, as you don’t need a second raise.
- Melee: Raise and Cure, as Rampart is less necessary. You’re not as squishy as your casting cousins.
- Variant Ultimatum is very composition dependent if no one else has a stun or is a tank.
Left Portal: Routes and Pulls Overview
Nothing you do can affect the Left Path until after the first boss. Instead you’ll simply take the scenic route up the mountain.
- First Pull: Shishu Yamawaro will cast a circle AoE simply called Dark, while Shishu Hitodama don’t really do anything but attack.
- Second Pull: You’re joined by Shishu Sharin, casting a cross AoE called Crimson Mandate.
- Third Pull: The enemies here change depending on the weather.
- If it’s raining, you’re greeted to Shishu Dorotabo and Shishu Kosamebo. The Dorotabo will cast Water III, a big circle of an AoE to dodge. The Kosamebo won’t do anything.
- Windy weather brings Shishu Fuko, who has another large circle AoE called Scythe Tail. The Yamabiko do nothing.
- Fourth Pull: Shishu Kiyofusa, with a frontal cone AoE called Clearout that simply put, hurts. Alongside more Yamawaro from earlier.
Route One (Gift of the Onmyoji): When presented with the Auspice statues, ignore the puzzle and use the Crystal Ball immediately. You’ll then find a Katana case in the next room. Interact with it.

Screenshot by PC Invasion
Route Two (The Crimson Sword): Do not interact with the Katana this time and proceed into the final boss room.
If you pick these routes, your remaining pulls are this:
- Fifth Pull: Two more Kiyofusa come to ruin your day.
- Sixth Pull: The Shishu Kotengu casts a conal AoE called Isso, but it doesn’t hit that hard. There’s also three Hitodamas.
Route Three (A Tale of Dead Men): Now we’re going to do the Auspice statue puzzle. Rotate Suzaku to the north (facing the door) and Seiryu to the west, then interact with the orb. A new path opens up for you to follow.

Screenshot by PC Invasion
After defeating mobs on the roof, you’ll go inside to another room. There’s a mob called Shishu Apa. To get this route, you have to leave it alone until it casts Water III to put out the lanterns in the room, then continue on.
Route Four (Forging a Legacy): Now the party has to focus down and stun the Apa before it can cast Water III to keep the lanterns lit.
- Fifth Pull: Two Hitodamas, a Yamawaro, and two Shishu Onmistu. They cast a line AoE called Shuriken. It kind of hurts, so don’t get hit.
- Sixth Pull: Shishu Apa, as previously explained, as well as a Shishu Izumo. It casts a large circle AoE called Malefic Aura.
Middle Portal Overview
Taking the middle route puts you on a direct path to Shojo Temple. Like the left path, none of your actions affect the route until after the first boss, but you can at least change later enemies encountered and the first boss’ mechanics.
- First Pull: Two Shishu Sharin and three Hitodama.
- Second Pull: A bunch of Shishu Koja. They don’t do anything.
- Third Pull: Three Koja and two Sharin.
- Fourth Pull:
- If you pulled the rope, you get two Kontengu and three Koja. There’s nothing to note here about either.
- If you didn’t, you face a Mifune and multiple Koja. The Mifune used a large line AoE called Burnished Joust.
- Fifth Pull: A single mob called Shishu Yoko. It deals a large circular AoE called Spinning Slash with a safe area close to the mob, so stick close.

Screenshot by PC Invasion
Route Five (The Luthier and the Songstress): Proceed forward with Hancock the whole way. When you come to the White Baboon, accept its offer and spare it.
Route Six (Lost to Avarice): Tell the Baboon you need a moment to think about it. It will attack you, but its easily defeated.
Sixth Pull: Three Koja and two Yamawaro.
Route Seven (Beyond the Lantern’s Light): Don’t follow Hancock through the door. Instead, there’s a makeshift staircase made of crates behind you in the same room.
#gallery-1 { margin: auto; } #gallery-1 .gallery-item { float: left; margin-top: 10px; text-align: center; width: 50%; } #gallery-1 img { border: 2px solid #cfcfcf; } #gallery-1 .gallery-caption { margin-left: 0; } /* see gallery_shortcode() in wp-includes/media.php */
-
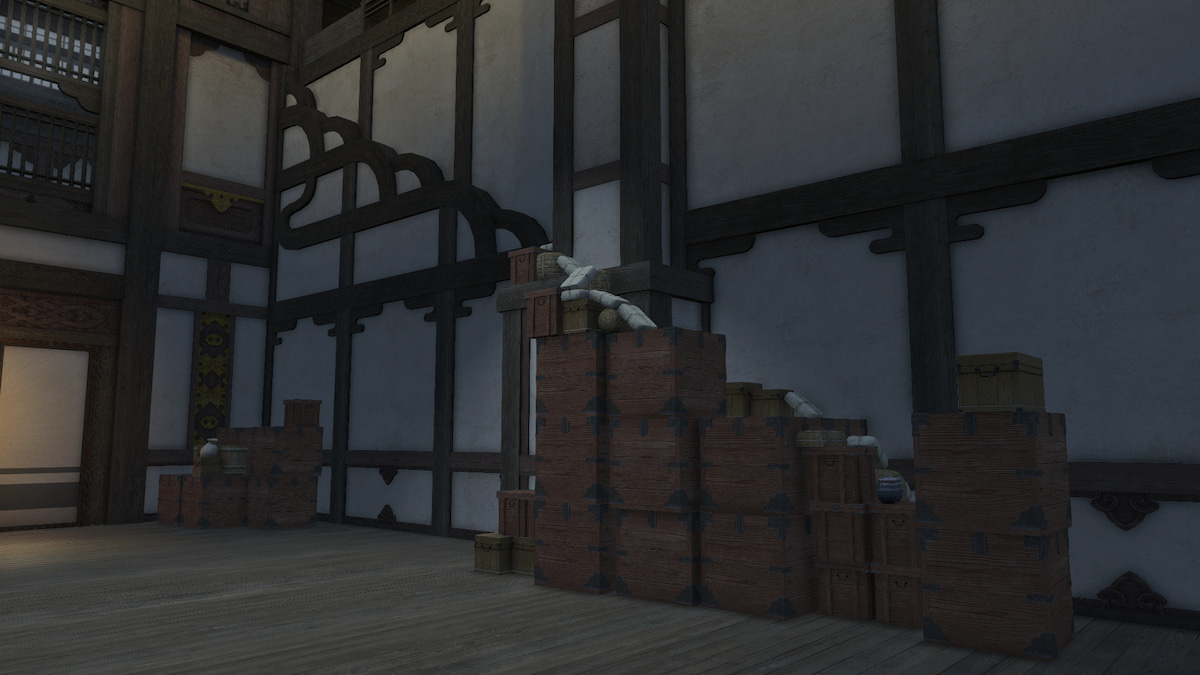
- Screenshots by PC Invasion

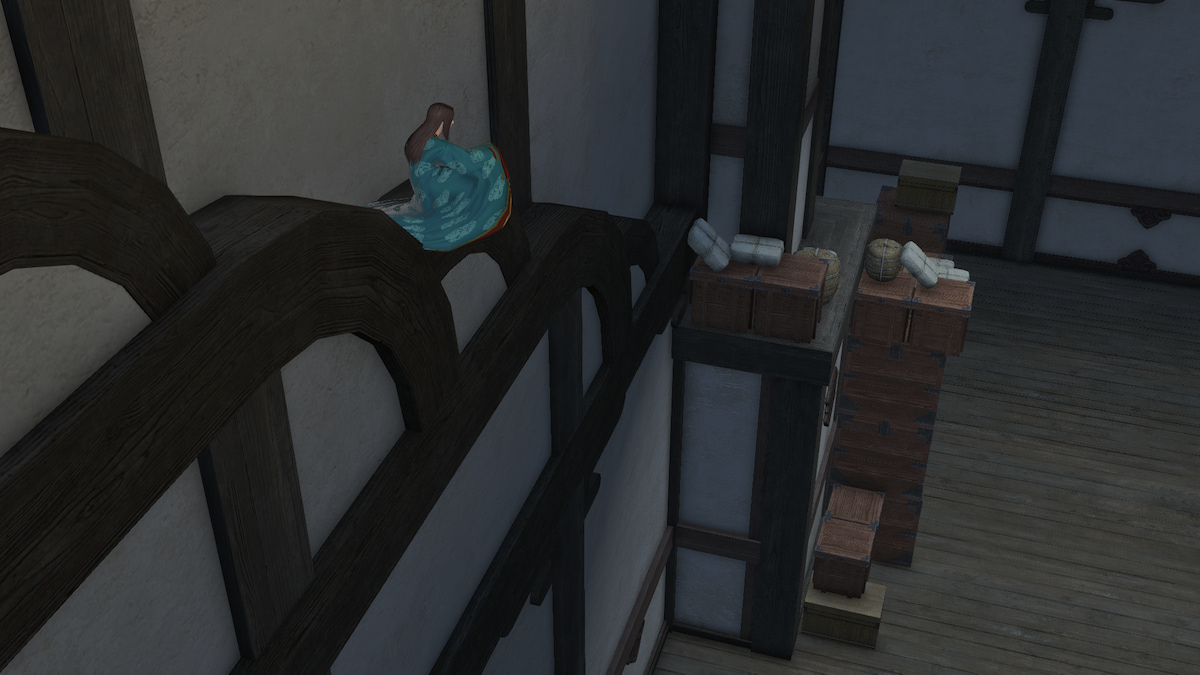
Climb it all the way up and pull the rope to let Hancock join you.
Route Twelve AKA the Secret Route (The Osgiseru’s Fate): Climb the crates and let him join you again. This time, however, when the Chochin appear, you have to pull them down into the previous room. There are several lanterns in this room. Each one standing underneath a banner needs to be lit by a Chochin. So drag them over to the lanterns one by one and defeat them one by one.

Screenshot by PC Invasion
They will light each lantern upon defeat, opening up a Lantern of Passage to interact with.

Screenshot by PC Invasion
Sixth Pull: Three Chochin.
Right Portal Routes
If you opt for the right portal, you eschew civilization entirely and take a walk through nature. Cursed objects may or may not be included.
- First Pull: Seedkin come to attack you; the Hoko don’t do anything, but the Irakusa has a large circle AoE called Tornado. This attack hurts very badly, do not try to make friends with it.
- Second Pull: Alongside three Irakusa are variants of the Sharin mobs called Wanyudo. They cast Midnight Mandate, which is a circular AoE compared to their counterparts.
- Third Pull: All new seedkin in the form of two Furutsubaki and Tenaga. The Tenaga has a line AoE called Ovation.
This is the only route where the outcome changes before the first boss. Hancock is drawn to a Dogu statue just below the staircase to the first boss.

Screenshot by PC Invasion
Route Eight: Ignore the Dogu and proceed. However, you’ll come across four Scared Stones on the path. You need to interact with each one. The stones are at (11.6, 10.0), (10.8, 8.6) (10.3, 8.3), and (9.8, 6.3) respectively.

Screenshot by PC Invasion
Route Nine: Don’t interact with anything, just go through the path.
- Fourth Pull: Three Red Shishu Penghous and a Shishu Jumokko. The Jumokko casts two AoEs Acorn Bomb- a circle AoE spell you’ll recognize if you’ve done Blue Mage, and Backhand Blow, a conal AoE.
- Fifth Pull: Three Shishu Kuzuri that perform a conal AoE called Savage Swipe.
- Sixth Pull: Two Red Penghou and two Yamawaro alongside a Sai Taisui. The Taisui uses a cross AoE called Sweeping Invocation, so prepare to move.
Route Ten: Now take the Dogu and fight the boss. You’ll come to a path with a picket fence. Ignore the fence and instead focus on the shrine.

Screenshot by PC Invasion
Use the Eastern Bow emote in front of it (/ebow) and it will open. Put the Dogu inside and the stump turns into another path. When faced with the final choice of path, pick the Iwakura.
Route Eleven: We’re doing the same thing, but we’re picking the Ancient Tree at the end instead of the Iwakura.

Screenshot by PC Invasion
- Fourth Pull: Introduces a Shishu Raiko alongside three Penghou. Ignore the Penghou and focus down the Raiko, as it’s a much more deadly mob. It casts Disciples of Levin, a circle AoE which will either ask you to run away or stick close depending.
- Fifth Pull: You’re faced with two Raikos. Focus one down and then deal with the other.
- Sixth Pull: Three Penghous alongside a Daitengu. The Daitengu uses Yama-Kagura, which is a very big line AoE.
Mount Rokkon Bosses: Yozakura the Fleeting

Screenshot by PC Invasion
No matter what route you pick, your first boss will always be this possessed Shinobi woman. She has a set of universal mechanics and then others that vary per route.
Universal mechanics:
- Glory Neverlasting: Tankbuster.
- Art of the Windblossom/Fireblossom: Windblossom is a ‘get in’ AoE, meaning the safe space is next to her, while Fireblossom is a ‘get out’ AoE.
- Oka Ranman: Raid-wide AoE.
- Seal of the Fleeting/Riotous Bloom: Two or Four piles of petals appear around Yozakura, depending on how far you are into the fight. There is an element above each pile: Water, Wind, Fire, and Lightning/Levin. Watch the piles and see where the arrows go, as this will tell you where to be when the cast goes off. Two of them will be absorbed at once, and this will tell you what the attack will be.
- Wind: The attack will be an outward cast, so you need to be close to her.
- Fire: The attack explodes in a ring of fire around her, so get away.
- Water: The attack targets the intercardinal directions, so stand in a cardinal direction to be safe.
- Lightning: The cardinal directions are hit with lightning, so get to the intercardinal directions for the safe space.
- Kuge Rantsui: Another, weaker raid wide.
The rest vary by route.
Left Path, Windy Weather:
- Windblossom Whirl: When this cast goes off, the entire arena becomes an AoE except for right next to her.
- Levinblossom Strike: Within the existing safe space, more circular AoEs appear. This attack goes off six separate times in a row. Navigate to each round’s narrow safespace.
- Drifting Petals: While Levinblossom is still happening, Yozakura prepares to knock the player back out of the middle. You’ll have enough time after Levinblossom Strike to move into the very middle before this attack goes off, then run back in.
- Seasons of the Fleeting: Outlined in red are four different sets of either directional conal or horizontal line AoEs. This is showing you the attacks about to come. Stand in the safe spaces to avoid all four.
Left Path, Rainy Weather:
- Bunshin and Shadowflight: Yozakura creates a Mirrored image of herself for each player. They will disappear, but don’t forget about them. When she then uses Shadowflight, they will reappear with little warning next to each player and do a short line AoE. In short: if she’s casting Shadowflight, run.
- Mudrain: Several piles of mud fall from the sky. Entering them will inflict you with debuffs.
- Icebloom: Circle AoEs will start following the players. Run in different paths, avoiding the mud piles.
- Mud Pie: The mud piles turn into balls of mud that start casting line AoEs. Move out of the path of them. You have ample time to get away, thankfully. Be careful, though, Shadowflight is coming up right after this.
Middle Path, Rope Left Alone
- Tatami Trap + Tatami-gaeshi: When the cast goes off, take note of where the floorboards shake. They will flip over when she later uses Tatami-gaeshi after the next two mechanics and hurt if you’re caught in them.
- Levinblossom Lance: Yozakura lets off a quick succession series of line AoEs. Follow the direction the arrows are pointing and position yourself next to the first AoE and move with the rotation as it goes off. She will do this twice in a row, the direction swapping the second time.
Middle Path, Rope Pulled:
- Silent Whistle: Yozakura summons dog minions to aid her.
- Donden-gaeshi + Art of the Fluff: The dogs move to the stages on one side of the arena. Face your character away from them so you don’t look at them.
- Fireblossom Flare: Yozakura summons several fire circle AoEs that follow the players. Run.
Right Path, Dogu Statue Left Behind:
- Bunshin/Shadowflight: Same as the left route in rainy weather, in case you really missed this mechanic. The only difference is Shadowflight goes off immediately after Bunshin.
- Nubuki: Several patches of thorns with Bulbs inside them grow on the arena. Avoid these. If you get snared, you’re not getting out anytime soon.
- Root Arrangement: Goes off twice in a row. One or two players depending on the party size will have a circle with multiple arrows appear underneath them. This is a warning they’re about to be followed by circle AoEs. Take a different path from the targeted players around the thorn circles.
Right Path, Dogu Statue Taken:
- Season of the Fleeting: Because I’m sure you missed this mechanic even more than Bunshin.
- Witherwind: Summons several Autumnal Tempest, tornadoes that slowly approach the players you have to avoid.
- Mudrain: Yup, it’s back!
- Drifting Petals: You have to deal with this knockback mechanic with tornadoes and mud this time. Use Arms Length if you don’t feel like dealing with that.
Mount Rokkon Dungeon Guide Left Path Final Boss: Moko the Restless

Screenshot by PC Invasion
More appropriately called Moko The Confusing Mechanics, this vengeful spirit and the right path boss are both a step up in difficulty. You really have to figure out his mechanics or you’re not going to have fun.
Universal Mechanics:
- Kenki Release: Raid-wide AoE. Be careful, this hurts.
- Iai-kasumi-giri: Moko readies his sword and then slices in every direction except for a safe spot. To figure out the safe spot, you have to line up the arrow inside the circle above the boss with the big arrow on the floor by turning your camera. If you’re the tank who is at the front of the boss and can’t do this as easily? The game clearly hates you specifically.
- Soldiers of Death: Moko summons additionals on the side of the arena who start casting Iron Rain. Giant lines of arrows will point out from them to where the attack lands. The attacks will be large circle AoEs, so find the safe spot that isn’t near the arrows.
- Spearman’s Orders: This is an identical mechanic to Charibert’s White Knight Sentries in the Vault. Stand on the opposite end of the arena as the Spearmen and watch them run down, then run between the largest gap to avoid being stabbed.
- Double Kasumi-giri: First version wasn’t difficult enough? Don’t worry, this boss has you covered. This is the singlest hardest mechanic in all of base Rokkon. After lining up his first arrow, the arrow will change to show the second slash. Move to the first safe space, then take note of the second arrow, as the safe space created will rotate with the boss for an immediate second slash. I told you this boss was fun. Here’s a diagram to make it easier:

Image via MS Paint
Route Mechanics:
- Route One:
- Untempered Sword: Moko summons several Ancient Katanas on the sides of the arena that start casting Line AoEs from one specifc side. You’ve seen this mechanic in several fights before, including Zodiark. Position yourself between the AoEs and in anticipation of which row goes off next.
- Azure Auspice: A ‘get in’ AoE. Stick close.
- Boundless Azure: Moko cuts several blue lines into the floor. They will go off one by one from east to west, and when each is about to, it gets arrows and a line. This means when one is about to go off, it will keep doing more line AoEs down the arena in quick succession. Think the water hands mechanic from Anamnesis Anyder’s final boss, but worse. Be prepared to run away and weave between AoEs.
- Route Two:
- Moonless Knight: The easiest of his additional mechanics, in my opinion. Moko summons giant Oni hands at either north/south or east/west. They will envelope most of the arena, leaving safe spots perpendicular to themselves in the center of the sides.
- Scarlet Auspice: Get away from Moko this time.
- Boundless Scarlet: The floor is cut into lines again, but this time it’s less complicated. It’s just a matter of watching for which one is going off first and staying away, then positioning for the ones to go after it. No aftersplashes.
- Route Three:
- Tengu-yobi: A bunch of Ill-come Tengu spawn on the arena sides, covering it in lines of arrows that go opposite directions. Walk towards the edge of the arena towards the Tengu lane you pick so you’re knocked back to the other side.
- Ghastly Grasp: Circle AoEs appear all over the arena while the previous mechanic is happening again. You have to use the knockback from the Tengu to avoid being knocked into these.
- Azure Auspice: Once more, with power!
- Boundless Azure: Wait, no, go back-
- Route Four:
- Spiritspark: Moko summons a bunch of circle AoEs at once to dodge, four times in a row. At the same time, a bunch of ghostly floating nightmare fuel heads float around the arena. Avoid them while dodging.
- Scarlet Auspice + Boundless Scarlet: Same as route two.
Mount Rokkon Dungeon Guide Middle Path Final Boss: Gorai the Uncaged

Screenshot by PC Invasion
The fallen head monk of the temple is the easiest of the bosses by far. None of his variation mechanics are particularly painful and his main rotation is manageable in the prediction category. Even better, his additional mechanic from routes only happens once. If you’re Potsherd farming, pick his routes.
Universal Mechanics:
- Unenlightenment: Raid-wide.
- Flickering Flame: Summons giant will-o-wisps on the sides of the arena.
- Sulphric Stone: Summons big floating rocks above the arena.
- Flame and Sulphur: Summons both of the previous two at once.
- Plectrum of Power: Whenever he is using this attack, it means the current AoEs will grow bigger. Stay between them.
- Morphic Melody: The current AoEs are going to change to the opposite of where they are. Stand in the AoEs for the safe space.
- Rousing Reincarnation: Each player is affected with three stacks of Rodential Rebirth. Three meteor circles appear in the arena. Watch the meteors fall and put yourself into each circle to remove one stack of the debuff. This prevents you from turning into a Pterosquirrel and losing out on DPS.
- Torching Torment: Tankbuster with a small AoE. Don’t be near whoever is targeted.
- Impure Pugation: Four cardinal direction cone AoEs followed immediately by intercardinal cones. Avoid by moving between them as they go off.
- Spike of Flame: Overlapping Circle AoEs will target each player to dodge.
Route Mechanics:
- Route Five:
- Willy Wall + Pure Shock: The Baboon from earlier comes back with a reinforcement for every member of the party. Each player has a chain pointing them to which Baboon they are going to be pulled into an enclosure with. Each player must solo kill their respective Baboon before it finishes casting Self Destruct. Meanwhile, Gorai will cast Impure Pugation and Spike of Flame.
- Route Six:
- Thundercall: Summons two Balls of Levin into the arena. Get to the sides perpendicular to them to avoid their overlapping AoEs.
- Humbled Hammer: A bunch of hammers fall from the ceiling onto circle indicators. Run from the circles.
- The second time he uses Thundercall after this, it’s immediately followed up by Humble Hammer. You have to find the Ball of Levin which is smaller with hammers circling it and run behind it to the corner. That will be your safe space.
- Route Seven:
- Fighting Spirits: Raid wide.
- Wordly Spirits: Two large, overlapping line AoEs on top of a rotation. Find one of the safe spaces in the corners and move with it as the attack moves.
- Biwa Breaker: One more powerful raid wide, for good measure, cast five times in a row. Hope you brought healers.
Right Path Boss: Shishio

Screenshot by PC Invasion
If you like pain and nightmare fuel, you’ll come face to face with Shishio, a fearsome creature from Hingashi legend. Most of its universal mechanics are pure suffering and the additional ones range from tolerable to painful. The good news is the route mechanic only happens once, but that’s barely a silver lining.
Universal Mechanics:
- Enkyo: The raid wise. It hurts. Get used to it, because he casts it frequently. Reprisal from tanks will be much needed.
- Stormcloud Summons + Smokeater: Shishio creates stormclouds in preparation for one of several mechanics to follow.
- Once on Rokujo: The clouds make an unsafe space in a big line around the boss, after which the remaining clouds start exploding with big circle AoEs. The simplest way to do this mechanic is to stand right next to the middle AoE and then move into the center to avoid the rest.
- Twice on Rokujo: The unsafe area forms an X pattern this time. You’re still safe if you run to the very middle after.
- Thrice on Rokujo: The only safe spaces are small triangles at the edge of the arena. When they finish going off, the two remaining clouds on the sides of the arena will cast overlapping, giant AoEs. You once more have to position yourself in the middle of the edge perpendicular to avoid these on either side.
- Thunder Onefold: The clouds all cast small line AoEs that follow the players. This is what we call a baiting mechanic. You have to run in to the middle and then back out until the mechanic ends, letting the lines follow you at a pace you can avoid stepping in them.
- Thunder Twofold: These are medium line AoEs. The strategy is the same, but I find them easier than the small ones.
- Thunder Threefold: The largest line AoEs. Strategy remains.
- Splitting Cry: The tankbuster, but it’s also a wide line AoE tankbuster. Don’t be near the targeted player.
- Noble Pursuit: The boss starts casting a big line AoE with rings appearing along it. Stand on the sides where there are not rings for the safe zone.
- This is always immediately followed by Thunder Vortex, a circular AoE with safe zones either far from the boss or right next to it. Pick your safe zone based on your capacity to gap close and the distance your attacks need.
Route Mechanics:
- Route Eight:
- Haunting Cry: First, it summons several Clever Thralls. Avoid them, as they attack with circle AoEs around themselves. Then come Feral Thralls which cast line AoEs. Finally, Venomous Thralls target the players with multiple rounds of multiple circle AoEs.
- Route Nine:
- Haunting Cry: This time, it turns 2/3rds of the arena into quicksand.
- Yoki: A bunch of circle AoEs will all appear in the arena to get out of, twice in a row.
- Yoki-uzu: A large AoE that takes up all of the safe area. You have to run into the quicksand and then run back in right after the attack goes off.
- Route Ten:
- Haunting Cry: This version is the worst one, in my opinion. Devilish Thralls are summoned. They will raise their right or left hand to swipe. You have to visually look at all of them to figure out the safe space. You WILL die if you fail. This happens twice in a row.
- Route Eleven:
- Haunting Cry: The easiest variant. This time, ghosts are summoned. Each one is tethered to a player and follows them. All you have to do is stay away from them until they go away.
Mount Rokkon dungeon guide Secret Route Boss: Enenra

They were tempting fate with this boss concept. Screenshot by PC Invasion
Despite being the secret boss, Enenra is the second easiest of all the bosses, because Moko and Shishio insist on being actual hell to beat in their corners. I guess we can’t all be the Sil’dah Subterrane secret boss.
- Flagrant Combustion: Standard raid wide.
- Out of the Smoke: Smoke pours out from the pipe through the arena. Follow the smoke and stand behind where it stops trailing for the safe spot.
- Kiseru Clamor: A ring mechanic, where the donut AoE keeps being cast in succession. Move into the last AoE after its cast to avoid the others. This becomes more difficult when its cast again, as the boss has split into two. Now you have to dodge both.
- Smoke and Mirrors: Oh right, the boss is splitting in two. Focus on one, you don’t have to match their HP. They will keep fusing and unfusing.
- Smoke Rings: Stand next to either boss for the safe spot.
- Smoke Stack: The boss fuses back to one.
- Smoldering Damnation: Summons pools of smoke that slowly expand and turn orange. You have to avoid each pool when it turns orange and goes off by weaving between them.
- Pipe Cleaner: Each player gets a tether. Stay away from each other or else you’ll cleave each other with the attacks.
- Snuff: Tankbuster with a wide AoE. Run away from other players.
- Clearing Smoke: This time get in the center to avoid the twins.

Screenshot by PC Invasion
Mount Rokkon Rewards
Related: How to get the Shishioji mount in FFXIV
There are three ways to get rewards from Mount Rokkon. Some are exchanged from Rokkon Potsherds and Shishu Coins (found in Another Mount Rokkon) from Trissant in Old Sharlayan (12, 13.3), while some are a low drop chance from the Personal Spoils coffers.
Rokkon Potsherds
- Head glamour: Shishu Bujin Eboshi, 9 potsherds
- Body glamour: Shishu Bujin Hitatare, 18 potsherds
- Legs glamour: Shishu Bujin Kiribakama, 9 potsherds
- Feet glamour: Shishu Obutozori, 9 potsherds
- Head glamour: Shishu Gozen Kanzashi, 9 potsherds
- Body glamour: Shishu Gozen Kochiki, 18 potsherds
- Legs glamour: Shishu Gozen Hakama, 9 potsherds
- Fashion accessory: Rose-colored Spectacles, 3 potsherds
- Emote: Ballroom Etiquette- Scrupulous Citations, 9 potsherds
- Hairstyle: Modern Aesthetics- Ambitious Ends, 6 potsherds
- Looping in the Deepest Fringes Orchestrion Roll, 9 potsherds
Shishu Coins
- Mount Rokkon Framer’s Kit, 8 coins
- Shishioji Flute, 100 coins
- Crimson Rise Orchestrion Roll, 8 coins
- IX and X level materia, 2 and 4 coins respectively
Personal Spoils
- Magicked Prism (Onibi)
- Okuri Chochin minion
- Shiromaru minion
- Kuromaru minion
Completing all twelve routes gives you the Burabura Chochin Whistle from the achievement menu. And with that, the Mount Rokkon Dungeon Guide has completed. Now the bigger question is, was it all worth it, and is Hancock an interesting character now?
- SEO Powered Content & PR Distribution. Get Amplified Today.
- PlatoData.Network Vertical Generative Ai. Empower Yourself. Access Here.
- PlatoAiStream. Web3 Intelligence. Knowledge Amplified. Access Here.
- PlatoESG. Automotive / EVs, Carbon, CleanTech, Energy, Environment, Solar, Waste Management. Access Here.
- BlockOffsets. Modernizing Environmental Offset Ownership. Access Here.
- Source: https://www.pcinvasion.com/ffxiv-mount-rokkon-dungeon-guide-paths-bosses-and-rewards/
- :has
- :is
- :not
- :where
- $UP
- 1
- 10
- 100
- 11
- 12
- 13
- 8
- 9
- a
- About
- about IT
- above
- Accept
- accessory
- achievement
- across
- Action
- actions
- actual
- Additional
- affect
- After
- again
- Aid
- All
- alone
- along
- alongside
- also
- always
- ambitious
- amount
- an
- Ancient
- and
- Another
- anticipation
- anything
- appear
- appearing
- approach
- appropriately
- ARE
- AREA
- Arena
- arms
- around
- arrangement
- Art
- AS
- At
- attack
- Attacks
- Aura
- auto
- avoid
- avoiding
- away
- Azure
- back
- badly
- ball
- banner
- base
- based
- BE
- because
- becomes
- before
- behind
- being
- below
- Better
- between
- Beyond
- Big
- bigger
- Bloom
- blow
- Blue
- border
- BOSS
- bosses
- both
- Boundless
- Brings
- brought
- Bunch
- but
- by
- call
- called
- camera
- CAN
- Capacity
- Cardinal
- careful
- case
- casting
- Category
- caught
- ceiling
- Center
- chain
- Chance
- change
- Changes
- character
- choice
- Circle
- circles
- Clamor
- clearly
- climb
- Climbing
- Close
- Coins
- come
- comes
- coming
- compared
- complete
- Completed
- complicated
- concept
- confusing
- continue
- Corner
- corners
- covered
- covering
- created
- creates
- creature
- Cross
- Crystal
- cure
- Current
- Cut
- cuts
- damage
- Dark
- day
- dead
- deal
- dealing
- Deals
- Death
- deepest
- defeating
- dependent
- Depending
- Die
- difference
- different
- difficult
- Difficulty
- direct
- direction
- disappear
- distance
- do
- Dodge
- does
- Doesn’t
- Dog
- Dogs
- doing
- done
- Dont
- Door
- DOT
- down
- drawn
- Drop
- each
- Earlier
- easier
- easiest
- easily
- East
- eastern
- Edge
- eight
- either
- element
- eleven
- else
- end
- ends
- enemies
- enough
- entering
- Entire
- entirely
- Even
- Every
- everyone’s
- Except
- exchanged
- existing
- Expand
- explained
- Explodes
- Face
- faced
- facing
- FAIL
- Fall
- Fallen
- far
- farming
- fate
- Favorite
- feel
- fence
- few
- fight
- fights
- Figure
- final
- Finally
- Find
- Finder
- finish
- Fire
- First
- five
- flare
- Flip
- Float
- floating
- Floor
- Focus
- follow
- followed
- following
- follows
- For
- Forging
- form
- forms
- Forward
- found
- four
- frequently
- friends
- from
- front
- Fuel
- full
- fun
- fusing
- Gallery
- game
- gap
- General
- get
- Get Rewards
- getting
- giant
- gift
- gives
- glamour
- Go
- Goes
- going
- good
- grasp
- greeted
- Grow
- guide
- hammer
- hand
- Hands
- Happening
- happens
- Hard
- hates
- Have
- he
- head
- heads
- her
- here
- him
- his
- Hit
- hope
- Horizontal
- How
- However
- HP
- HTTPS
- Hurt
- hurts
- i
- identical
- if
- iii
- image
- immediate
- immediately
- in
- included
- Including
- Indicators
- inflict
- inside
- instead
- interact
- interesting
- into
- invasion
- IT
- ITS
- join
- joined
- jpg
- just
- Keep
- Kill
- Kind
- kit
- Knight
- lands
- landscape
- Lane
- large
- largest
- Last
- later
- least
- Leave
- leaving
- left
- Legacy
- Length
- less
- let
- Lets
- letting
- Level
- light
- lightning
- like
- Line
- lines
- lining
- little
- Look
- losing
- lost
- Low
- made
- Main
- make
- manageable
- mandate
- Margin
- Match
- Matter
- May..
- meaning
- means
- meant
- Meanwhile
- measure
- mechanics
- medium
- melody
- member
- Men
- Menu
- Middle
- missed
- Modern
- moment
- more
- most
- MOUNT
- Mountain
- move
- moves
- moving
- MS
- much
- multiple
- must
- my
- narrow
- Nature
- Navigate
- Near
- necessary
- Need
- needed
- needs
- New
- news
- next
- no
- normal
- North
- note
- nothing
- now
- objects
- of
- off
- offer
- oh
- Old
- on
- once
- ONE
- ones
- only
- onto
- open
- opening
- opens
- Opinion
- opposite
- Optimize
- or
- Orange
- order
- orders
- Other
- Others
- out
- Outcome
- over
- Pace
- Pain
- painful
- part
- particularly
- party
- passage
- Patches
- path
- Pattern
- PC
- PC Invasion
- People
- per
- perform
- perhaps
- personal
- PHP
- pick
- picked
- pipe
- plato
- Plato Data Intelligence
- PlatoData
- player
- players
- Point
- pool
- Pools
- Portal
- position
- positioning
- power
- powerful
- prediction
- preparation
- Prepare
- prepared
- Prepares
- presented
- prevents
- previous
- previously
- Pulls
- pursuit
- put
- Puts
- puzzle
- quest
- question
- Quick
- raid
- RAIN
- raise
- range
- really
- recognize
- Red
- regular
- release
- remaining
- remains
- remote
- remove
- respective
- REST
- Rewards
- right
- Ring
- Rise
- Roll
- roof
- Room
- rounds
- Route
- routes
- ROW
- ruin
- rules
- Run
- safe
- same
- Scale
- scared
- scenic
- screenshots
- Second
- Secret
- see
- seen
- SELF
- separate
- Series
- set
- Sets
- seven
- several
- shallow
- she
- Short
- shot
- should
- show
- showing
- side
- Sides
- Silver
- simply
- single
- SIX
- Size
- sky
- Slowly
- small
- smaller
- Smoke
- So
- solid
- some
- Soon
- Sound
- Space
- spaces
- spam
- Spawn
- specifically
- spectacles
- SPELL
- spike
- spirit
- split
- Spot
- stack
- Stacks
- stages
- stand
- start
- Starting
- starts
- stay
- Step
- stepping
- Stick
- Still
- STONE
- Stones
- Stops
- Strategy
- strike
- suffering
- Summons
- sure
- swapping
- Take
- taken
- takes
- taking
- tale
- tank
- Tanks
- Target
- targeted
- targets
- tell
- ten
- Tether
- than
- that
- The
- The Vault
- The West
- their
- Them
- themselves
- then
- There.
- These
- they
- thing
- Think
- this
- Thorn
- though?
- three
- Through
- time
- times
- tips
- to
- top
- tornado
- towards
- tree
- true
- try
- TURN
- Turning
- turns
- Twice
- Twins
- two
- Universal
- unlocked
- until
- upon
- us
- use
- used
- uses
- using
- Variant
- Vault
- venture
- version
- very
- via
- wait
- Wall
- warning
- was
- Watch
- watching
- Water
- Way..
- ways
- we
- Weather
- Weave
- WELL
- were
- West
- What
- when
- whenever
- which
- while
- white
- WHO
- whoever
- whole
- wide
- will
- wind
- WISE
- with
- woman
- worry
- worse
- Worst
- worth
- X
- you
- Your
- yourself
- zephyrnet
- zones