One of the many benefits of a laptop is the ability to take it with you wherever you go. If you’re a regular traveler, you definitely wan to make sure the time on your computer matches the time zone you’re currently in. Making this happen automatically is actually quite simple. Here’s how to do it.
Time Zone Settings in Windows 11
Open your settings menu by clicking the Windows icon on the task bar and selecting the gear icon.
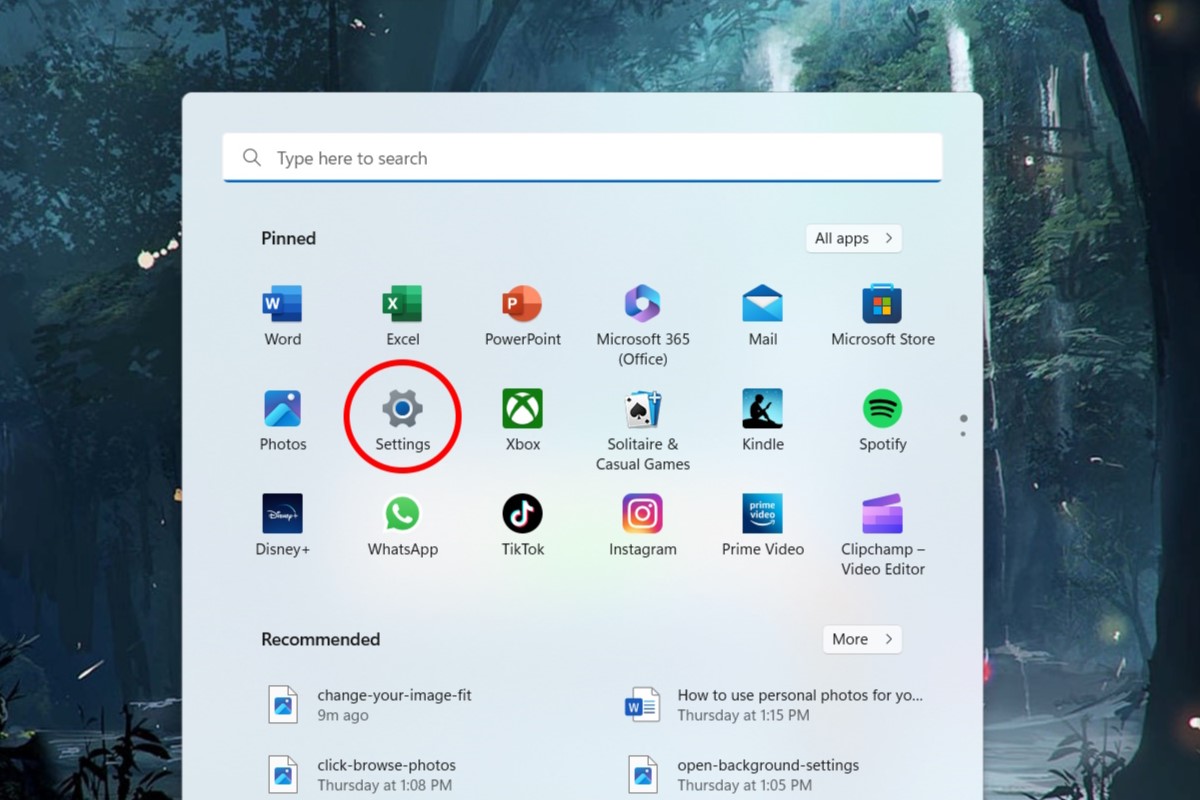
IDG / Alex Huebner
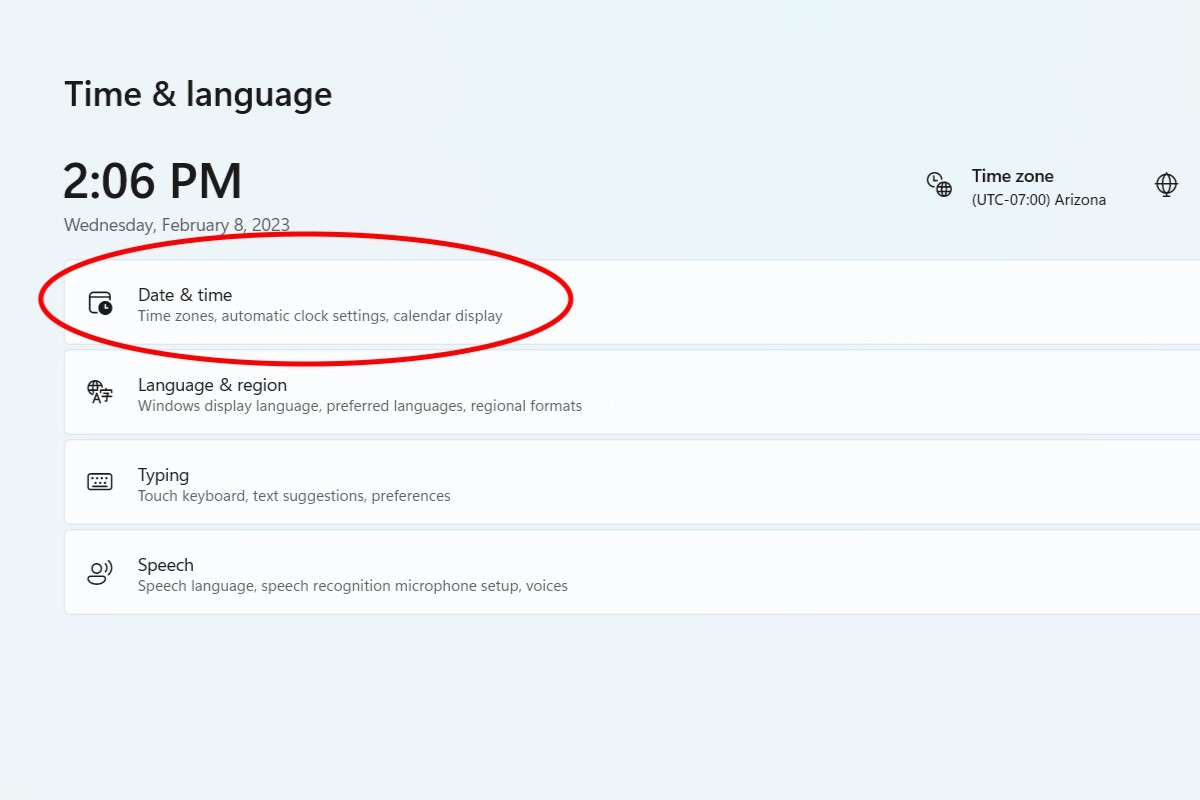
On the left-hand side of the screen, select Time & language.
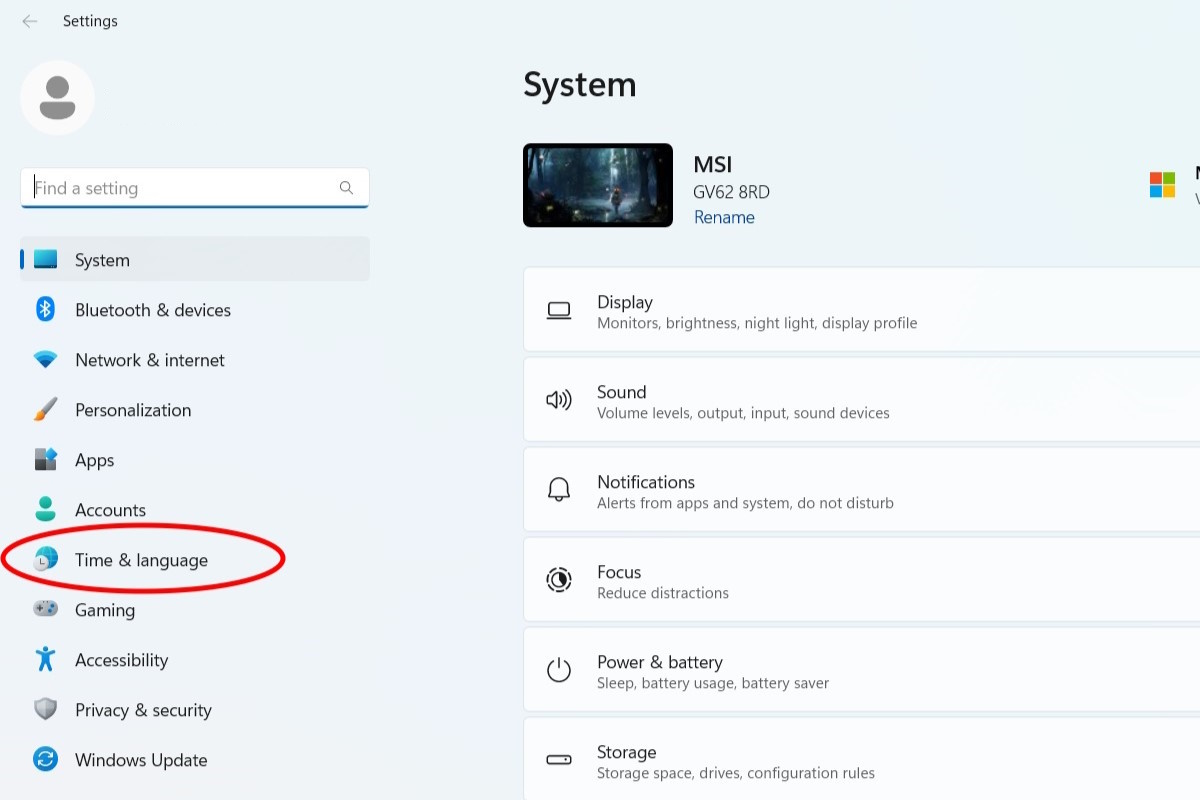
IDG / Alex Huebner
When you’re in the Time & Language menu, select Date & Time.
IDG / Alex Huebner
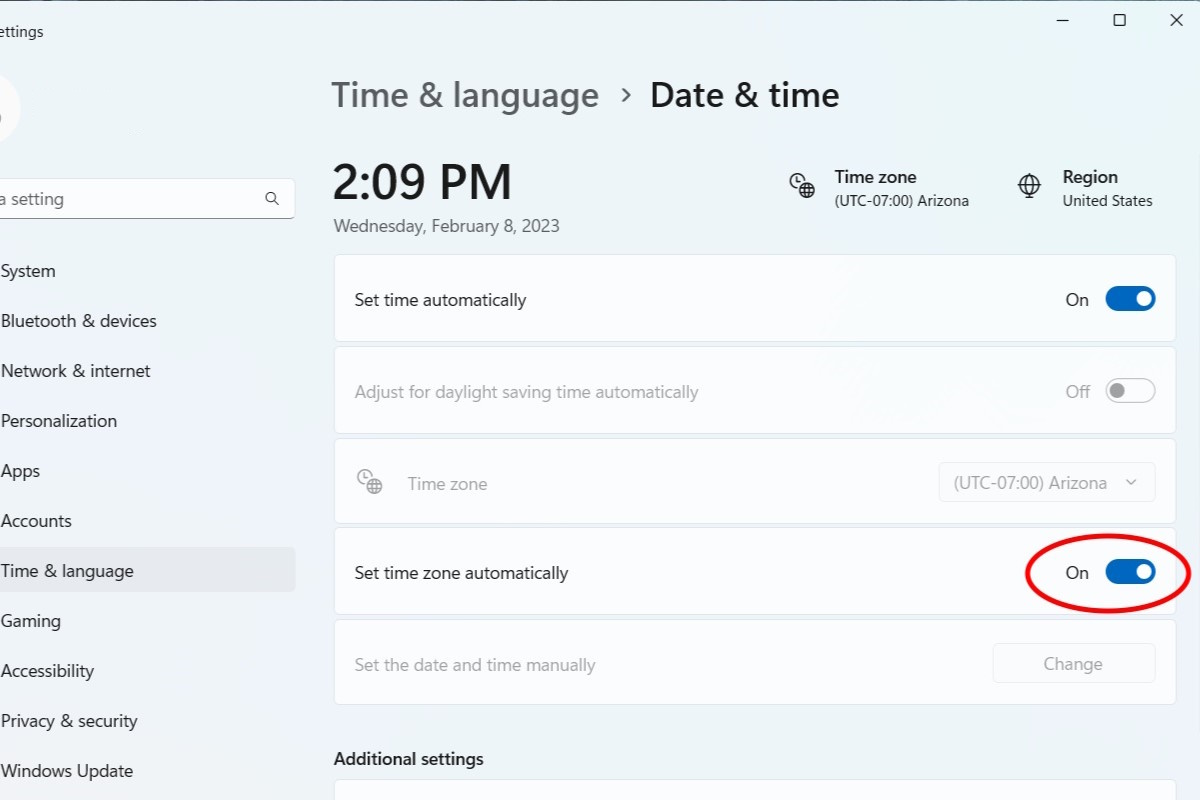
To allow your laptop to change time zones automatically, make sure the slider on set time zone automatically is flipped.
IDG / Alex Huebner
If you’d like to keep it set to a specific time zone, turn the automatic feature off and select a time zone from the drop-down menu.

IDG / Alex Huebner
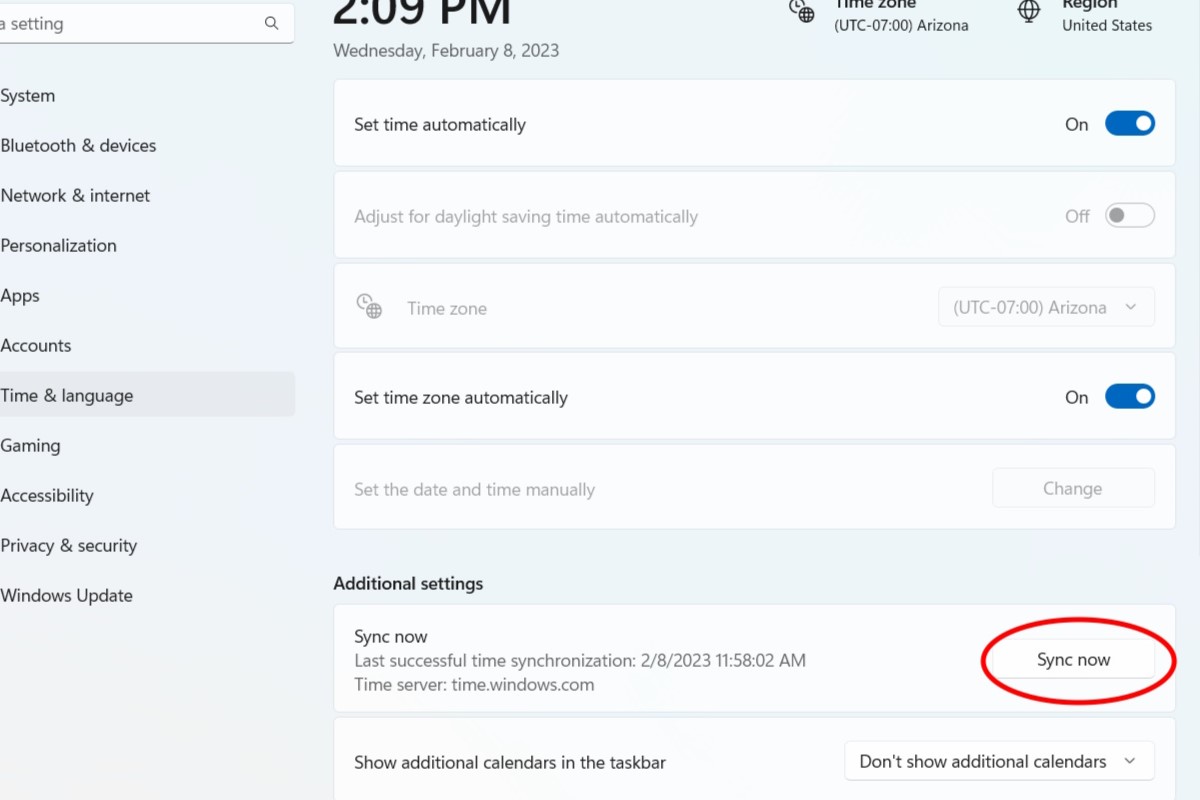
If your time still seems off, you may need to press the Sync now button in the Additional Settings section.
IDG / Alex Huebner
- SEO Powered Content & PR Distribution. Get Amplified Today.
- Platoblockchain. Web3 Metaverse Intelligence. Knowledge Amplified. Access Here.
- Source: https://www.pcworld.com/article/1513815/how-to-make-your-laptop-change-time-zones-automatically-in-windows-11.html
- 11
- a
- ability
- actually
- Additional
- alex
- All
- and
- Automatic
- automatically
- bar
- benefits
- button
- case
- change
- computer
- Currently
- Date
- definitely
- Doesn’t
- Ether (ETH)
- Feature
- from
- Gear
- Go
- happen
- How
- How To
- HTTPS
- ICON
- in
- IT
- Keep
- language
- laptop
- make
- Making
- many
- Menu
- Need
- open
- Option
- plato
- Plato Data Intelligence
- PlatoData
- press
- regular
- Screen
- Section
- seems
- selecting
- set
- settings
- Simple
- slider
- specific
- Still
- system
- Take
- Task
- The
- time
- to
- traveler
- TURN
- will
- windows
- windows 11
- Work
- Your
- zephyrnet
- zones